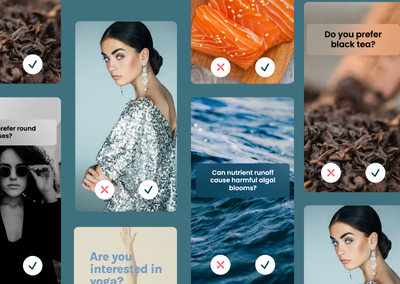
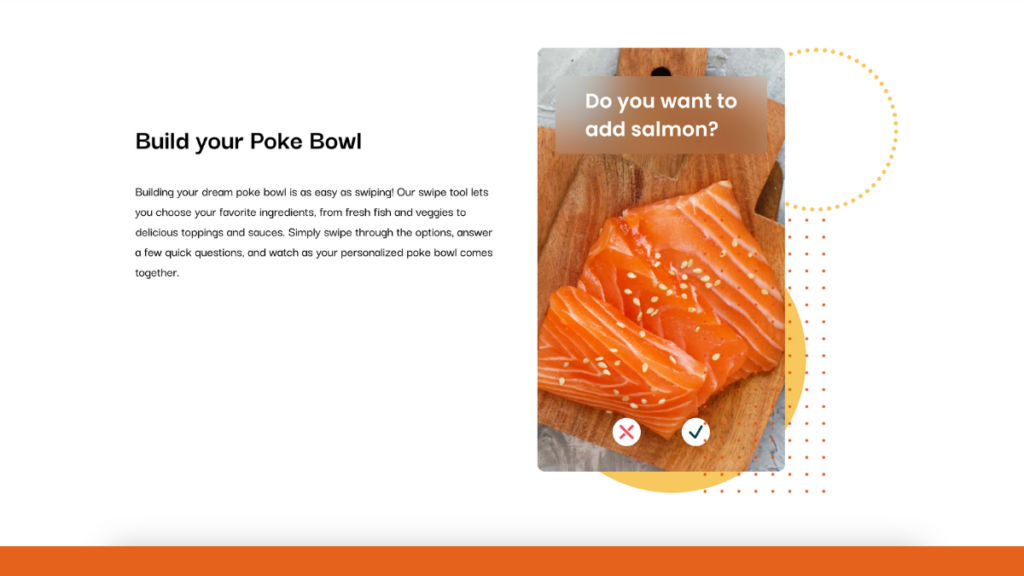
Using Guides for surveys can be an excellent idea for several reasons. Guides transform traditional survey questions into an engaging, interactive experience. Instead of monotonously clicking through questions, respondents can simply swipe left or right to answer, making the process more intuitive and enjoyable. It is also possible to add a multiple answer card with a Select Card, and challenge your audience with a Quiz Card.
This interactive Demo will illustrate how to use Roccai for surveys.
You can add a start card, info card, or end card. See more here.
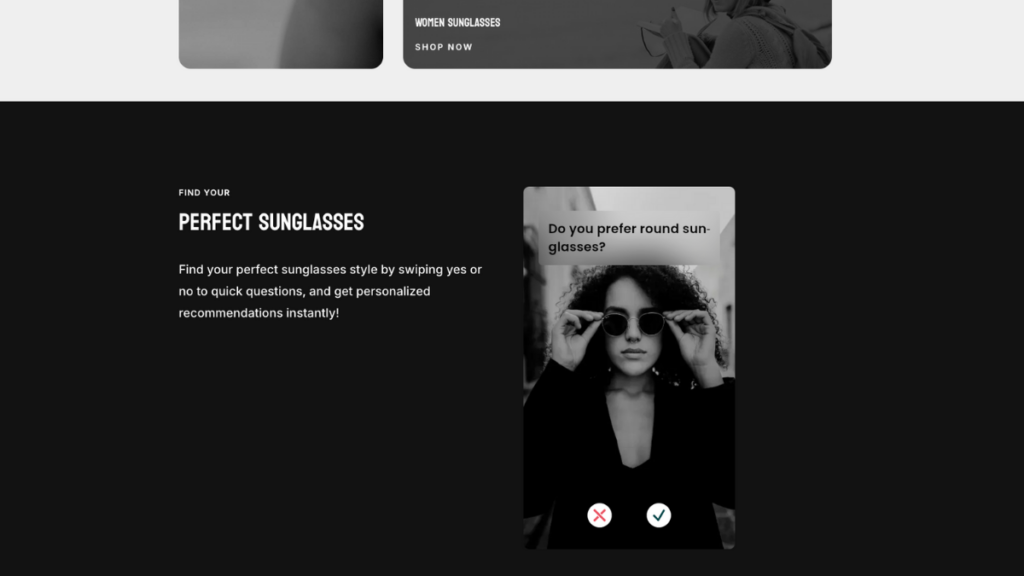
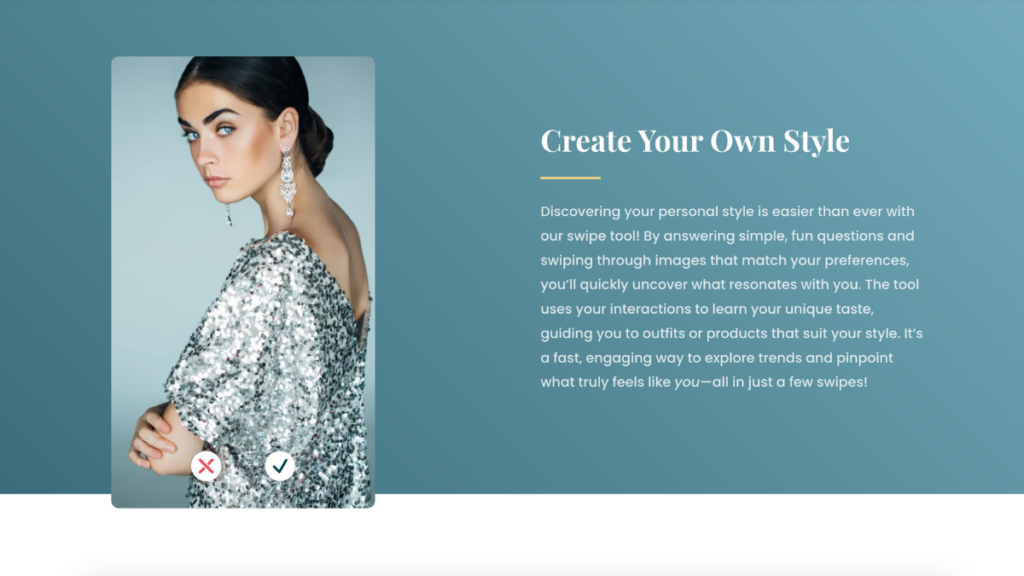
Your website’s visual appeal is crucial for capturing attention and keeping visitors engaged. With Roccai’s swipe module, you not only have a powerful decision-making tool at your disposal but also the ability to customize its visual layout to perfectly align with your brand’s unique style.
Let’s dive into the different styling options available and how you can create the perfect look for your site.
Explore a Variety of Customizable Styles
Create a section with two columns.
Set the background color to black or your preferred color.
Follow these easy steps to generate product feeds using the CTX Feed plugin. This method ensures that your product data is accurate, up-to-date, and ready to be uploaded to our platform to create your Swipe Journey.
Introduction to Product Feeds
Product feeds are files that contain a list of your products and their attributes, such as price, description, image URLs, and availability. These feeds are crucial for listing your products on various platforms like Google Shopping, Facebook Ads, and on our platform too.
Why Use CTX Feed Plugin
The CTX Feed plugin is highly recommended for its user-friendly interface and powerful features. It supports over 100 marketing channels and allows you to create feeds in multiple formats, including XML, CSV, and JSON. This flexibility ensures that your product data meets the specific requirements of different platforms, saving you time and effort.
Step-by-Step Guide to Installing and Using CTX Feed
For simplicity, this guide is divided into two parts. The first part helps you install and activate the CTX Feed plugin. Let's get started!
Part 1: Installing CTX Feed
1. Log in to Your WooCommerce Dashboard: Go to your WooCommerce admin panel.
2. Navigate to Plugins -> Add New: Search for "CTX Feed" in the search bar.
3. Install and Activate: Click on the "Install Now" button for the CTX Feed plugin and then activate it.
Part 2: Creating Your First Product Feed
Now, let's move on to the second part: creating and retrieving the product feed.
1. Access CTX Feed: After activation, find the CTX Feed option in your dashboard menu.
2. Create a New Feed: Click "Make Feed" to create a new product feed.
3. Select a Template: Choose a template based on the platform you want to integrate with.
4. Configure Feed Settings:
File Format: Select your preferred file type.
Mapping Attributes: Map your WooCommerce product attributes to the required fields of the selected platform.
5. Generate the Feed: Click on the "Generate" button to create your product feed.
6. Download and Manage: Once generated, you can download the feed or copy the URL to integrate with the Roccai platform. If you choose to download the file, the format must be either XML or JSON.
All done! In order to find and manage the feed you have just created, go to the "Manage Feeds" option from the CTX Feed menu. In there, you will find the newly generated product feed for the WooCommerce store.
Customization Options
This section will guide you through various customization options available in the CTX Feed plugin, including setting up auto-updates, creating custom attributes, and utilizing advanced filtering options.
1. Setting Up Auto-Updates
Keeping your product feeds up-to-date is crucial for maintaining accurate product listings on various marketing platforms. The CTX Feed plugin allows you to automate this process, saving you time and ensuring your feeds are always current.
Navigate to Manage Feeds: Go to the "Manage Feeds" section in the CTX Feed plugin.
Set Update Intervals: Choose how frequently you want the feed to update (e.g., every hour, daily, etc.). This ensures your product data remains current without manual intervention.
2. Creating Custom Attributes
Custom attributes allow you to add additional information to your product feeds that may not be included by default. This can be particularly useful for meeting the specific requirements of certain marketing channels.
Define Custom Attributes: Navigate to the custom attributes section in the CTX Feed plugin.
Add New Attribute: Enter the name and value of the custom attribute you want to add. For example, you might want to add a "Sale Price" attribute for products on discount.
Map Attributes: Ensure that the custom attributes are correctly mapped to the corresponding fields required by the marketing channel.
3. Utilizing Advanced Filters
Advanced filtering options in the CTX Feed plugin allow you to include or exclude specific products from your feeds based on various criteria. This helps in creating more targeted and relevant product feeds.
Access Filter Options: When creating or editing a feed, look for the filter settings section.
Apply Filters:
By Category: Include or exclude products from specific categories.
By Price Range: Set a minimum and maximum price range for products to be included in the feed.
By Stock Status: Include only products in stock or exclude those out of stock.
By Product Attributes: Filter products based on specific attributes such as color, size, or brand.
Save Filter Settings: After configuring the desired filters, save the settings to apply them to your feed.
Manual Product Feed Creation
While using a plugin like CTX Feed is the easiest and fastest method, it’s worth noting that you can also create product feeds manually. This involves exporting your product data into a CSV file and formatting it according to the specifications of the platform you're targeting. This method is more time-consuming and prone to errors, so a dedicated plugin is recommended.
FAQs
Can multilingual feeds be created?
Yes, CTX Feed Pro supports multiple languages and currencies, making it ideal for international operations.
How do I ensure my product feed is up-to-date?
The CTX Feed plugin offers an auto-update feature that allows you to set regular intervals for updating your product feeds. This ensures your feed data is always current.
What file formats does CTX Feed support?
CTX Feed supports various file formats, including XML, CSV, TXT, TSV, JSON, and XLS. This flexibility allows you to choose the format that best suits your needs and the requirements of the marketing channels you're using.
Following this guide, you can efficiently create and manage product feeds using the CTX Feed plugin, ensuring your products are accurately represented.
If you need further assistance, don't hesitate to contact our support team or consult the additional resources provided.
This guide will show you how to embed a swipe module on your website.
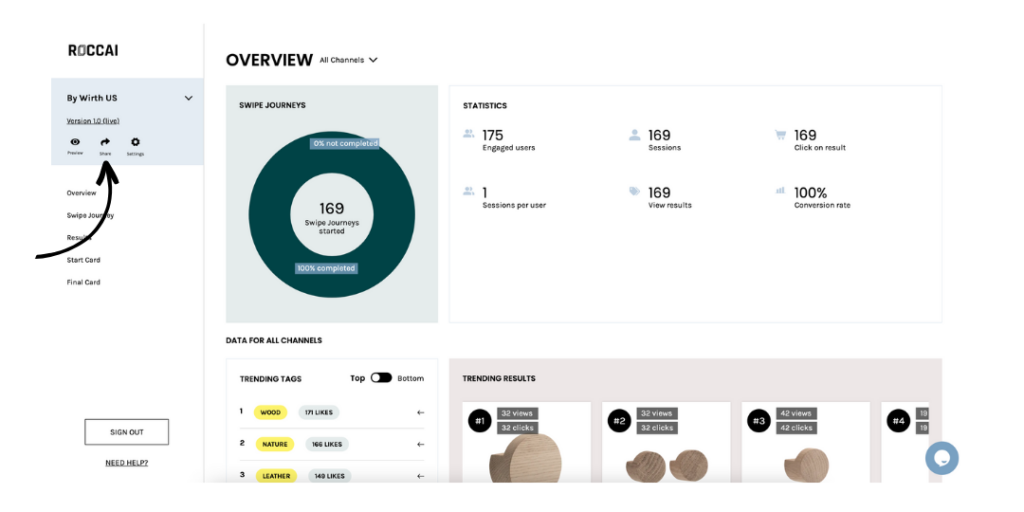
Step 1
Log in to Roccai and choose the module for which you want to create a campaign. Press the Share icon
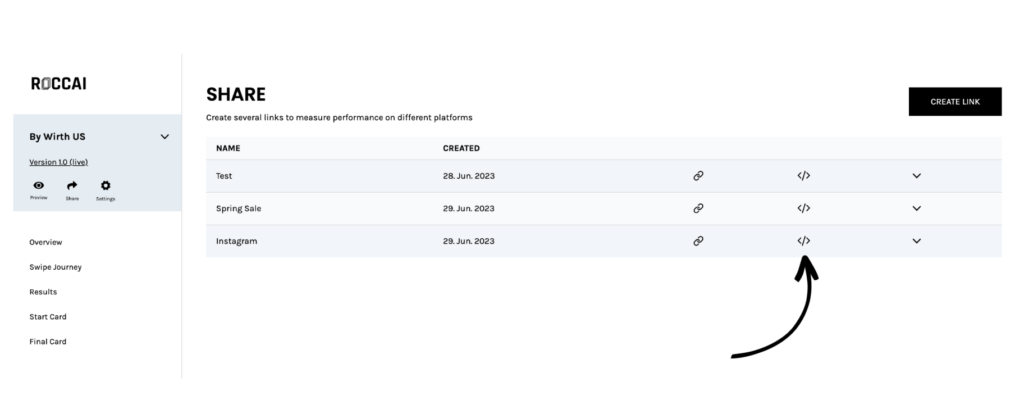
Step 2
Click the code icon next to the campaign you want to embed.
It can look like this (the link in the script contains your specific swipe module information).
Step 3a - If you use WordPress
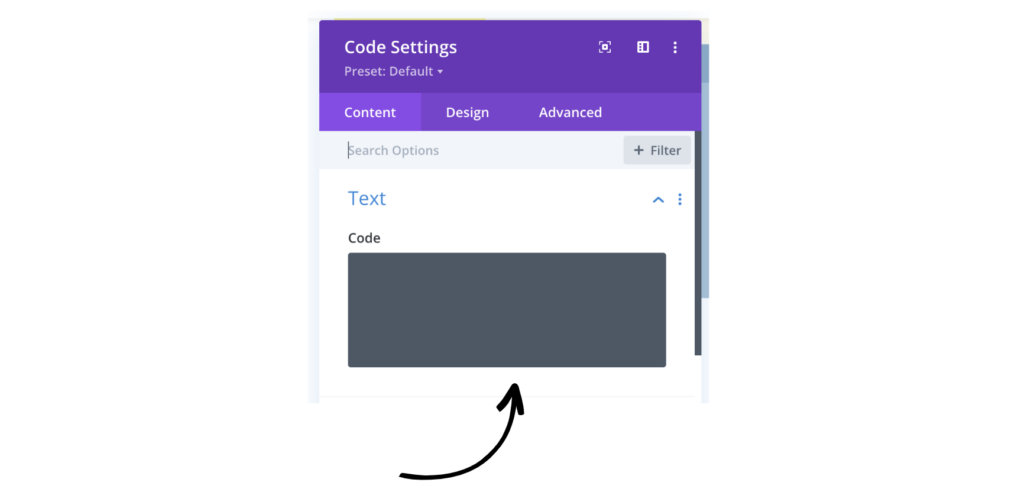
Log in to your website backend and find the page where you want to embed the swipe module. Add a code block and add the script here.
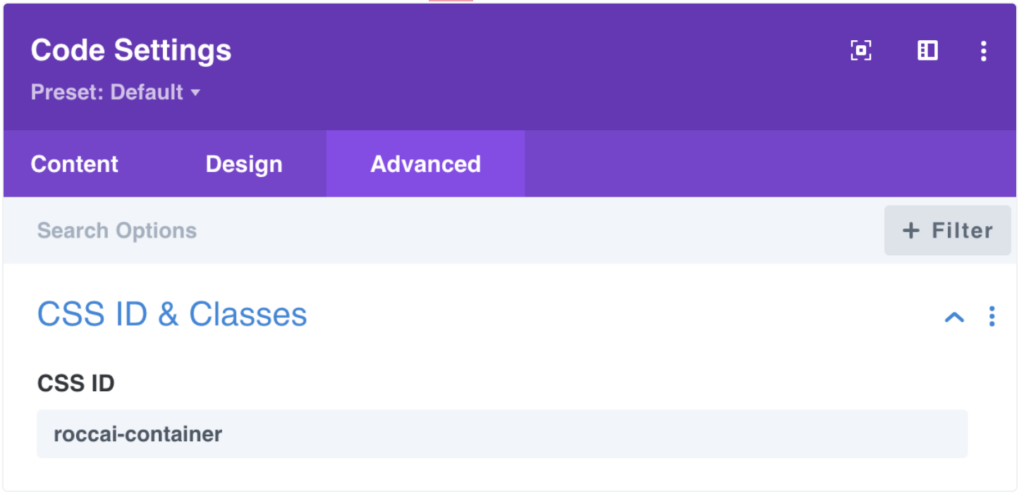
Then add the id roccai-container to the CSS ID field in the code block settings.
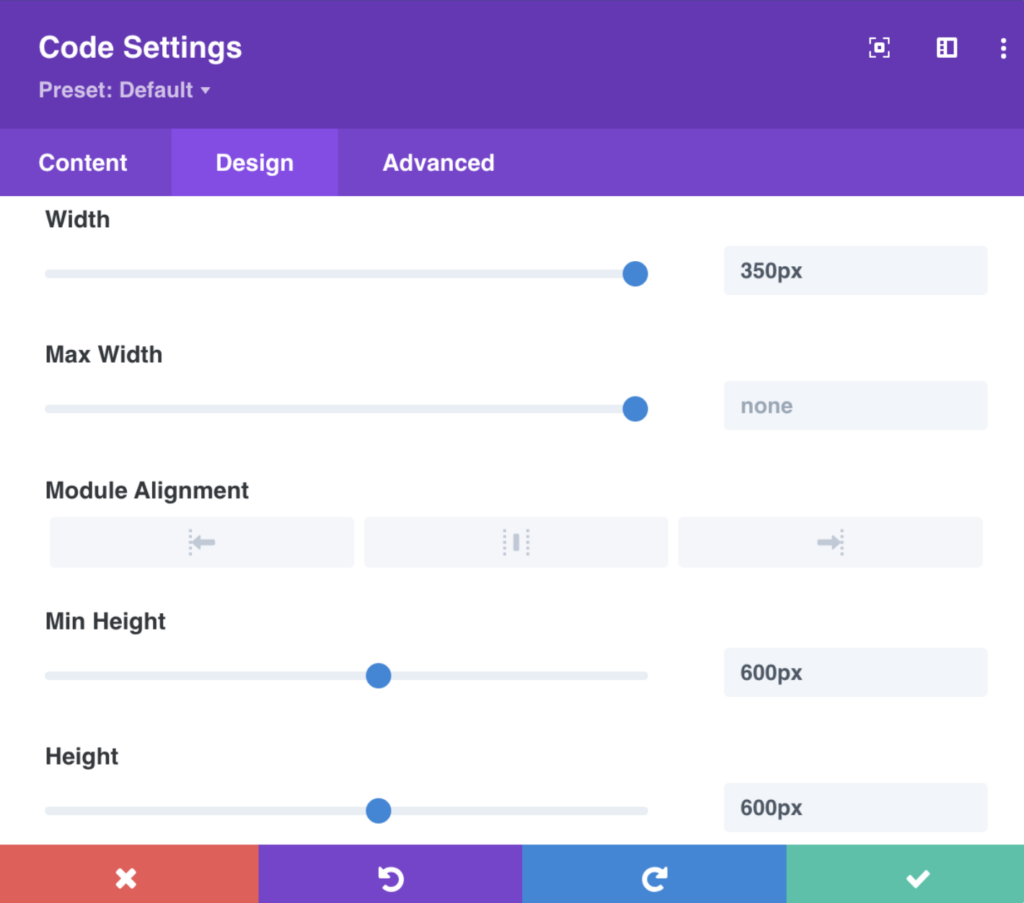
You can now style the size of the swipe module container. We recommend the following:
OBS: The embedded swipe module will be visible in the preview; it will not be visible in edit mode.
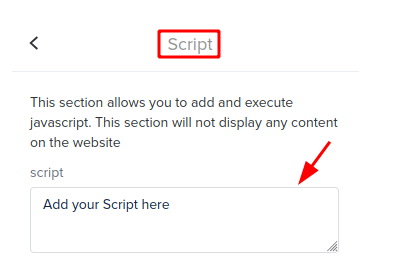
Step 3b - If you use Simplero
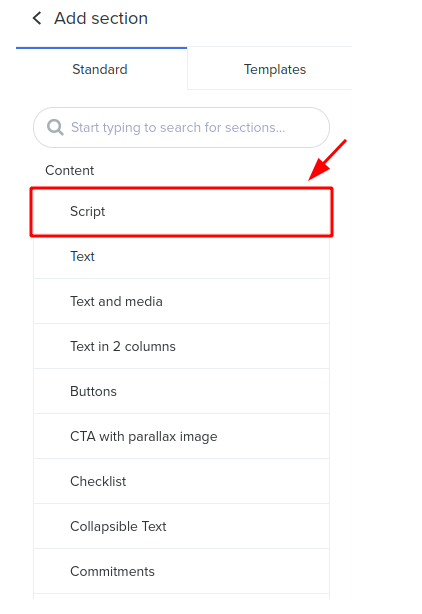
Log in to your website backend and find the page where you want to embed the swipe module. When adding a script on a Site or Landing Page, you'll be able to add a Script section.
Copy the script
and add it inside the script section:
Copy the container ID:
Click the HTML button located in the upper right corner of the toolbar, the last button the looks like "< >"
The Source code screen will open. Paste the embedded code where you want it and click the blue Ok button when done:
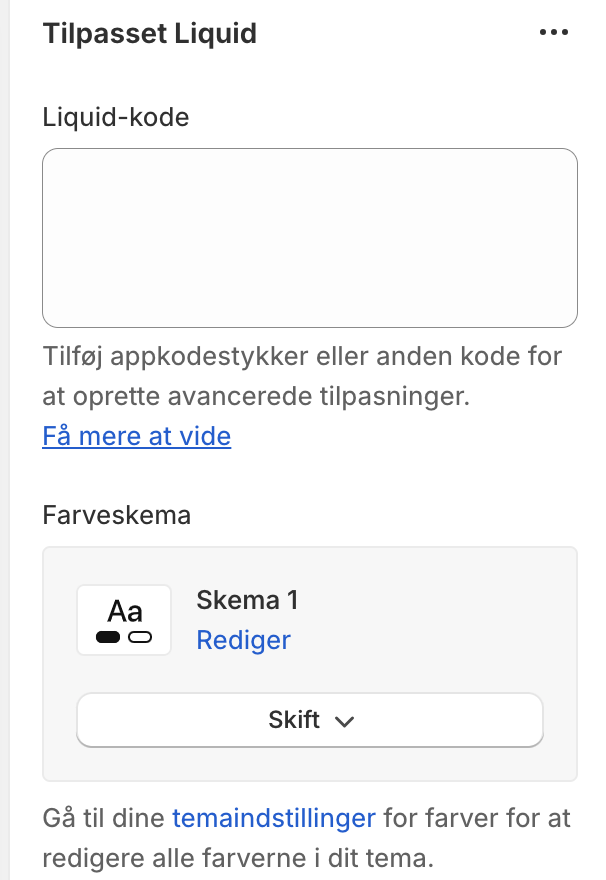
Step 3c - If you use Shopify
Log in to your website backend and find the page where you want to embed the swipe module. When adding a script on a Site or Landing Page, you'll be able to add a Liquid section.
In the Liquid-code field add both the script and the container ID
You view will still look blank but if you save and preview the page, it will load on the screen. You can style the module as you want by changing the styling in the container. style="width:100%;height:600px" this tell that it should take up 100% of the width and 600px in the height.
Step 3d - If you add to code
Copy the script and add it inside the <head>
Copy the container ID and add it inside the <body> where you want the swipe module to be displayed.
If you need our help, don't hesitate to get in touch with us via the chat in the bottom right corner.


Recent Comments