
How to introduce the swipe journey and collect data for Lead Gen
This is a guide on adding additional cards, such as start, info, and final cards, to your swipe journey. The purpose is to introduce the swipe journey but also to be able to collect user data for surveys, Lead Gen etc.
The Start Card
Step 1
You can add a start card once you have created your swipe journey (see onboarding guide). To do this, click Start Card in the menu to the left.

Step 2
You can introduce the swipe journey and describe the purpose and what happens next by adding a title, subtitle, image, and button text and press UPDATE. (Logo can be changed under Settings).

The Info Card
Step 1
You can find the Info Card under the Start Card in the menu on the left.

Step 2
You can find the Info Card under the Start Card in the menu on the left. Use this card to collect information on the user before swiping. This could be name, age, preferences, etc.
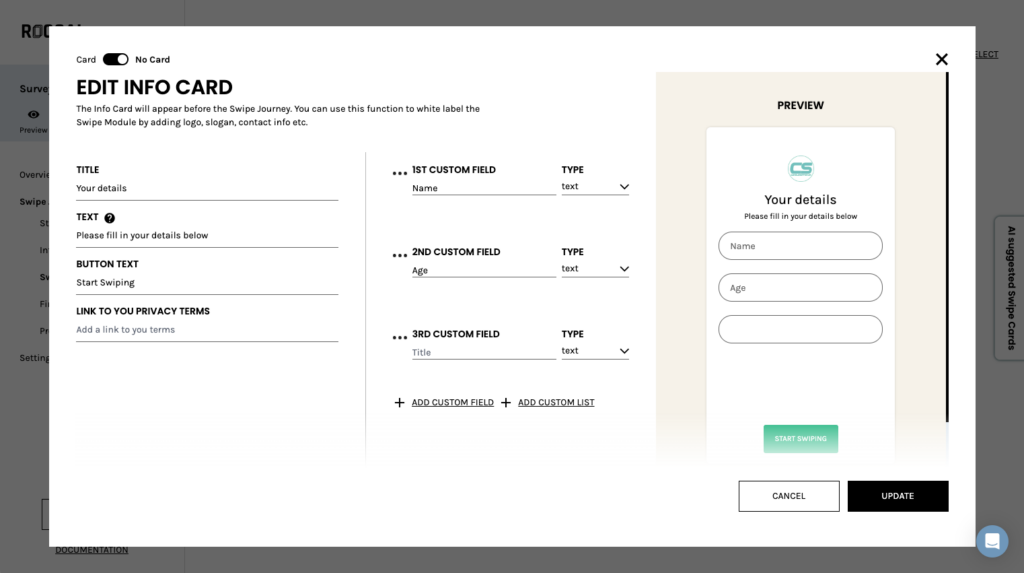
Remember to add your privacy policy.
The Final Card
Step 1
The Final Card is found in the menu on the left and is similar to the Info Card.
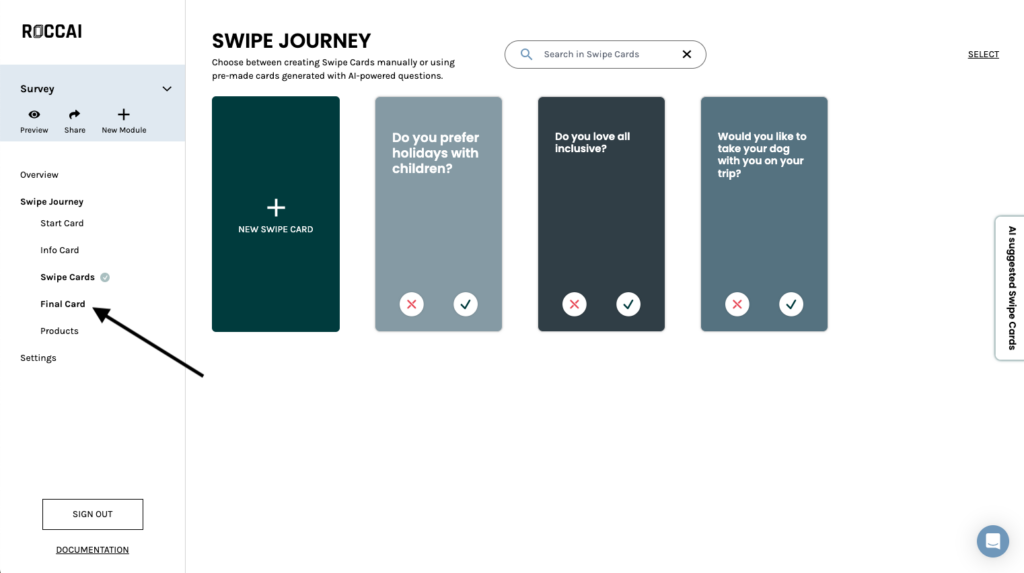
Step 2
The Final Card is used to collect information about the customer for Lead Gen after swiping. This can be name, email, mobile number, etc. It can also be a “well done,” “thanks for your help,” or “sign up for our newsletter.” Remember to add a privacy policy.
The button can lead to products, a website, or a popup.

It is also possible to go directly to the products if the customer does not want to fill out the contact form.

Find the styling of the secondary button under Settings.
If you need our help, please contact us via the chat in the bottom right corner.


Recent Comments