In eCommerce, maintaining up-to-date product information across multiple platforms is critical to ensuring customers see accurate details regardless of where they browse. Product feeds are structured files that serve this purpose, containing essential data about each item in your online store. This data typically includes product names, prices, descriptions, stock levels, and images, all organized to be easily shared across platforms.
Product feeds enable seamless communication of your product information with platforms like Google Shopping, Facebook Ads, or Roccai. By using these feeds, you ensure your customers have a consistent experience and see the same accurate product information, no matter where they shop. Additionally, product feeds can be set to automatically update whenever there’s a change in your store, helping you keep all platforms current without manual updates.
Why Are Product Feeds Important when using Roccai?
In Roccai, product feeds are essential for importing your store’s product information and ensuring it’s up-to-date. This data powers Roccai’s product recommendations, guiding customers to relevant items in stock at the correct prices. Here’s why that’s so important:
Up-to-Date Recommendations: With a product feed, Roccai can display only items that are currently in stock and priced accurately. This ensures a positive shopping experience, as customers see reliable, up-to-the-minute information on each product.
User Journey Customization: Roccai leverages product tags within your feed to tailor user journeys. This means you can create personalized shopping experiences for specific product categories. For example, if your store sells animal food, you could create a journey specifically for dog food, ensuring that relevant items appear for customers interested in this category.
For these reasons, it’s essential to use a product feed URL that Roccai can access and update as your store’s data changes.
What’s Inside a Product Feed?
Most product feeds include a set of standard fields that define each product in your store. Each field allows for accurate, clear representation of your products across various platforms. Here are the common elements in a typical product feed:
Product ID: A unique identifier for each product.
Product Title: The name of the product.
Product Description: A detailed description of the product.
Price: The current price of the product.
Sale Price: Any discounted price if applicable.
Stock Availability: Whether the item is in stock or out of stock.
Image URL: A link to the product image.
Category: The type or category of the product (e.g., shoes, high heels).
Product Attributes: Additional details like size, color, or material.
Each of these fields helps ensure your product is accurately represented across platforms, minimizing discrepancies and enhancing the customer’s shopping experience.
{
"products": [
{
"product_id": "12345",
"product_title": "Running Shoes",
"description": "Lightweight and breathable running shoes designed for comfort and performance.",
"price": 60.00,
"sale_price": 45.00,
"stock_availability": "In Stock",
"image_url": "https://example.com/images/running_shoes.jpg",
"category": "Shoes",
"tags": ["sports", "fitness", "running", "men"]
},
{
"product_id": "12346",
"product_title": "Hiking Shoes",
"description": "Lightweight and breathable hiking shoes designed for comfort and performance.",
"price": 30.00,
"sale_price": null,
"stock_availability": "In Stock",
"image_url": "https://example.com/images/hiking_shoes.jpg",
"category": "Shoes",
"tags": ["men", "hiking"]
}
]
}
Get help generating your Product Feed
If you’re using platforms like Shopify or WooCommerce, setting up product feeds is straightforward. For example, in Shopify, you can generate and export a product feed easily by following a few steps to connect with Google Shopping or other platforms. In WooCommerce, product feeds can be created and exported using built-in or plugin-based options, ensuring seamless integration with platforms like Google Shopping. For more details, you can explore our blogs on how to add a product feed in Shopify and how to generate product feeds in WooCommerce.
Conclusion
Product feeds are a powerful tool for eCommerce stores, helping you automate and manage product data across multiple platforms. Whether you’re using Shopify, WooCommerce, or another platform, having a well-structured product feed is key to reaching more customers, improving your SEO, and driving sales. For more tips on exporting product feeds, check out our dedicated blogs on Shopify and WooCommerce.
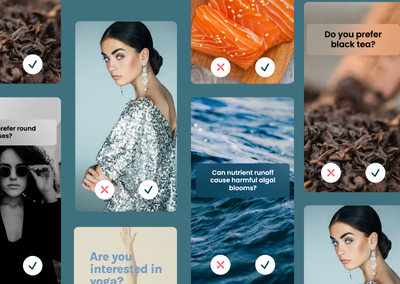
Your website’s visual appeal is crucial for capturing attention and keeping visitors engaged. With Roccai’s swipe module, you not only have a powerful decision-making tool at your disposal but also the ability to customize its visual layout to perfectly align with your brand’s unique style.
Let’s dive into the different styling options available and how you can create the perfect look for your site.
Explore a Variety of Customizable Styles
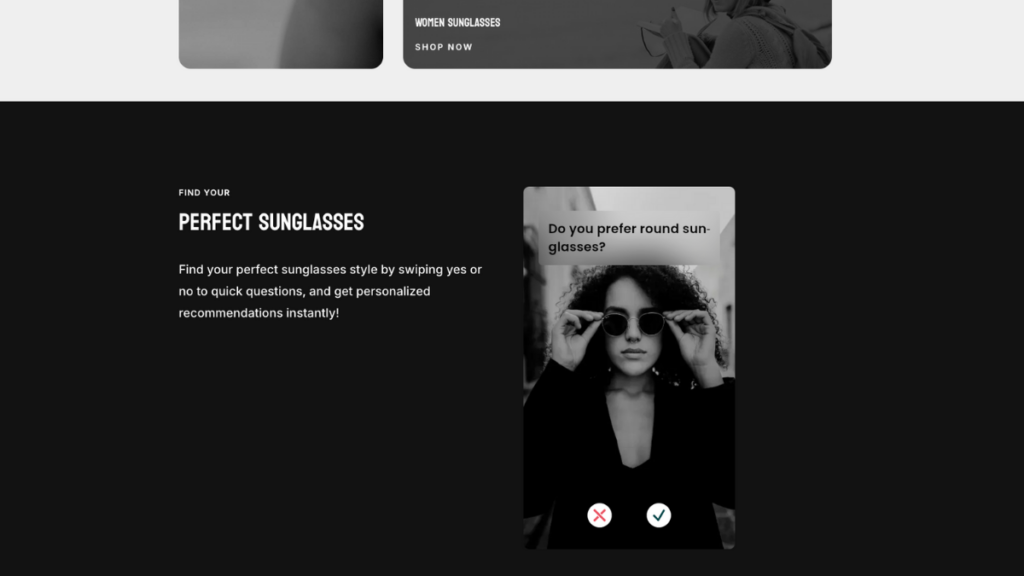
Create a section with two columns.
Set the background color to black or your preferred color.
As we illustrated in our Product Feed Generation Guide for WooCommerce, the easiest way to generate a product feed is, of course, with a plugin, and Shopify is no different! In this step-by-step guide, you will learn how to get product feeds from Shopify using the FeedFusion plugin.
1. Introduction: How to Get Product Feeds from Shopify
What are Product Feeds?
Product feeds are files that contain detailed information about your products, such as titles, descriptions, prices, and images. You can use these feeds to upload product information to the Roccai platform to generate your User Journey. The feed should be an URL and in XML or JSON format.
Why Use FeedFusion?
This guide will focus on the FeedFusion plugin for Shopify, a powerful tool that simplifies the process of generating product feeds. It offers advanced filtering options, making it easy to create tailored feeds that meet specific needs and ensuring that your product information is accurate and up-to-date across all platforms.
2. Setting Up FeedFusion on Shopify
Installing the FeedFusion Plugin
Go to the Shopify App Store: Open your Shopify admin panel and navigate to the App Store.
Search for FeedFusion: Type “FeedFusion” into the search bar.
Install the Plugin: Click on the FeedFusion app and click the “Add app” button. Follow the on-screen instructions to install the plugin.
Authorize the App: Once installed, authorize FeedFusion to access your Shopify store data.
Initial Configuration
Open FeedFusion:Open the FeedFusion app from your Shopify admin panel after installation.
Set Up Your Account: Follow the prompts to set up an account. This will include entering your business details and preferences.
Configure Basic Settings: Adjust the basic settings such as default currency, language, and target markets.
3. How to Get Product Feeds with FeedFusion
Accessing FeedFusion
Navigate to FeedFusion: In your Shopify admin panel, go to Apps and click on FeedFusion.
Dashboard Overview: Familiarize yourself with the FeedFusion dashboard. This is where you’ll manage all your product feeds.
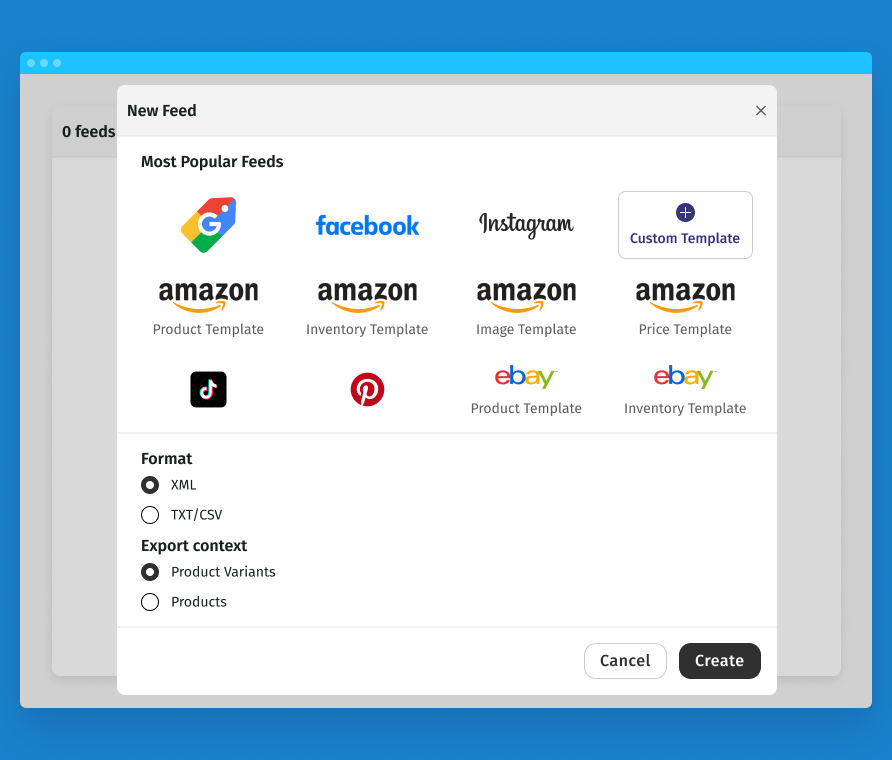
Creating a New Feed
Start a New Feed: Click on “Create New Feed.”
Choose a Template: Select a template that matches your needs, or start from scratch.
Select Products: Choose which products you want to include in your feed. You can select all products or specific collections.
4. Using Filtering Options in FeedFusion
Setting Up Filters
Access Filters: Within your new feed, navigate to the Filters section.
Add Filters: Click “Add Filter” and choose from the available options, such as price range, product type, or stock status.
Customize Filters: Adjust the filter settings to match your specific needs. For example, you can set a filter to include only products above a specific price.
For Roccai, we need the following
id (required)
title (required)
subtitle
description (required)
imageUrl (required)
link (required)
tags
categories
price
sales price
status (in stock etc.)
5. Exporting and Using Your Product Feed
Exporting the Feed
Choose Export Format: Choose XML to ensure a seamless upload to the Roccai platform.
Export the Feed: Click “Export” and save the file to your computer.
Integrating with Swipe Journeys
Upload the Feed:
You can read more about this process in our guide: Getting Started.
6. Troubleshooting and FAQs
Common Issues
Feed Not Updating: Ensure that the FeedFusion plugin has the necessary permissions to access your Shopify store data.
Incorrect Product Data: Double-check the filters and settings in FeedFusion to ensure they are configured correctly.
Additional Resources to get Product Feeds from Shopify
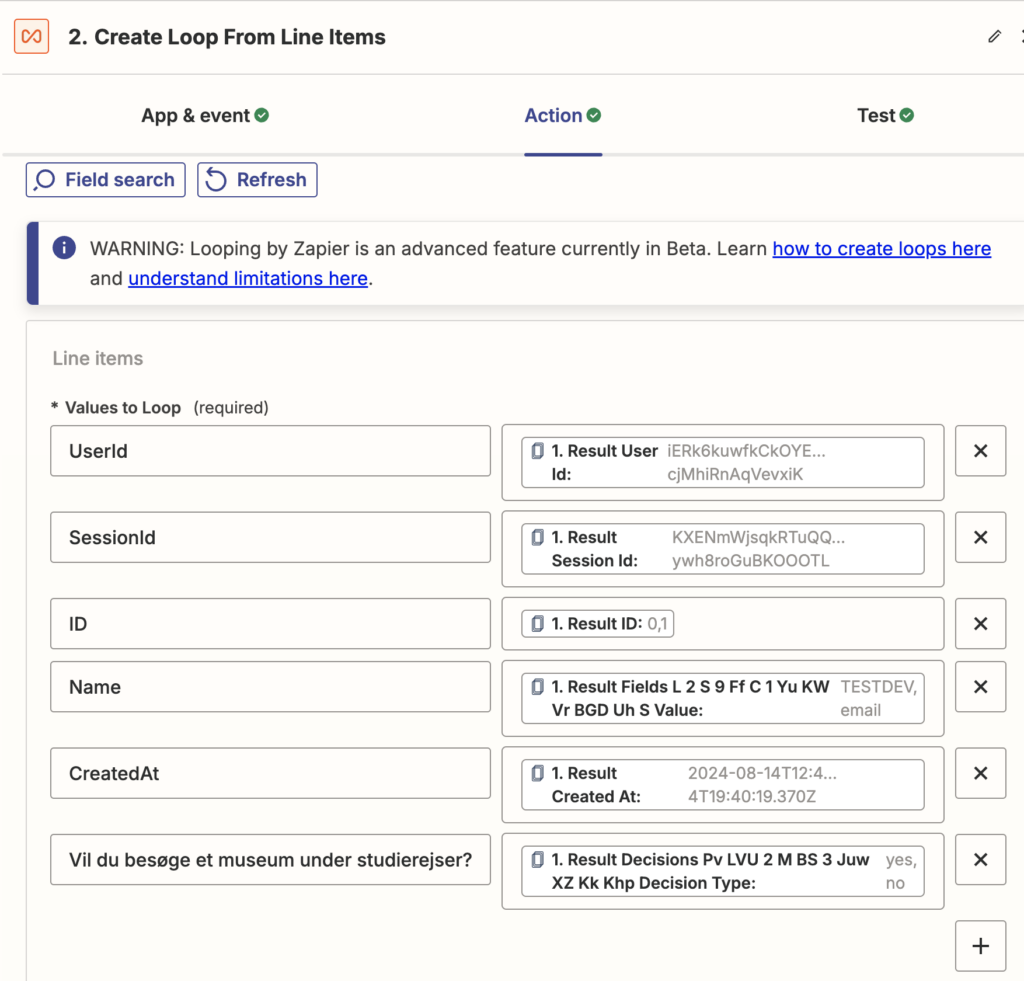
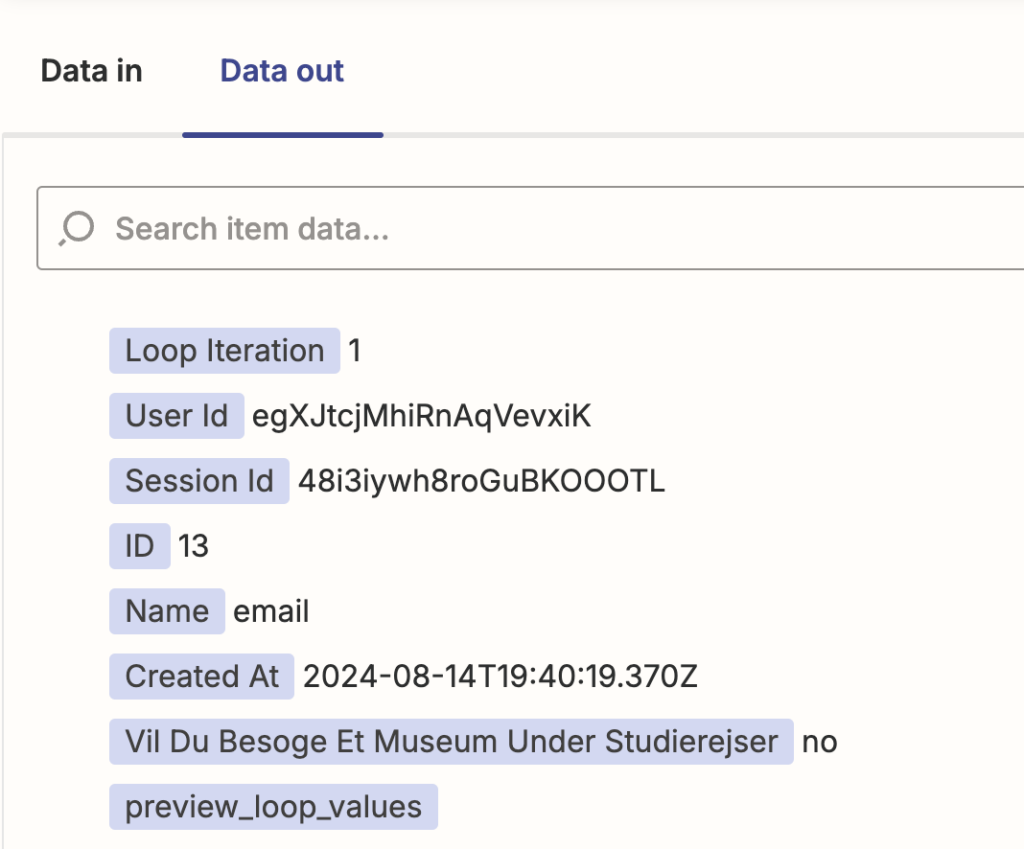
This guide will walk you through the steps to export your data from Roccai to your chosen dashboard platform. You can either use Roccai’s API directly or set up a scenario with Zapier or Make, depending on your platform.
This guide shows how to export your data from Roccai into your dashboard platform. Depending on your platform, you can either use the API from Roccai and do it directly or set up a scenario with Zapier or Make.
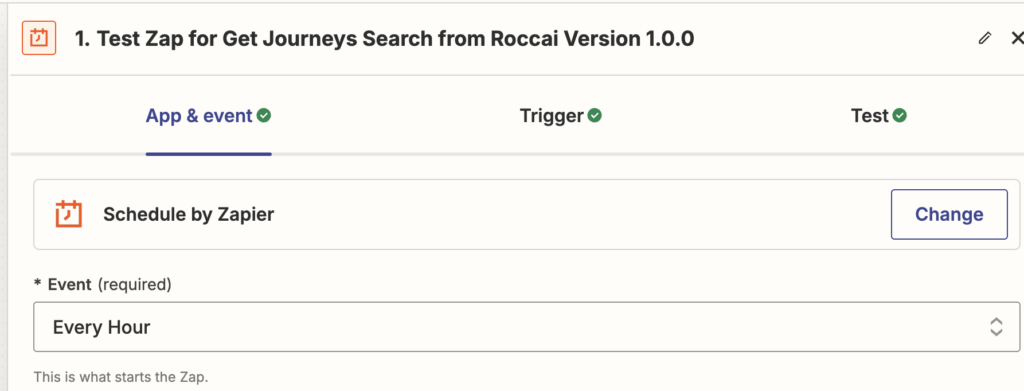
Step 1
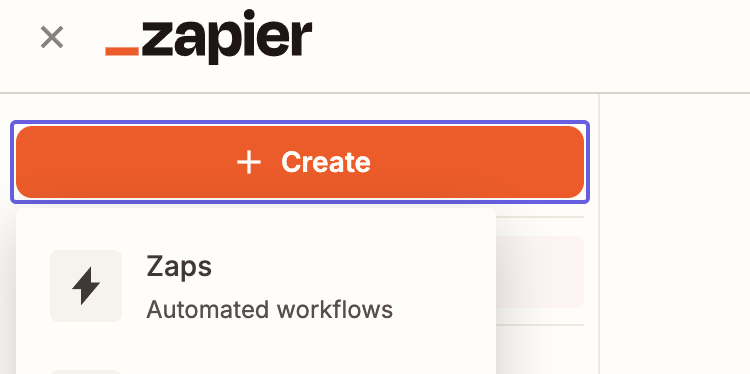
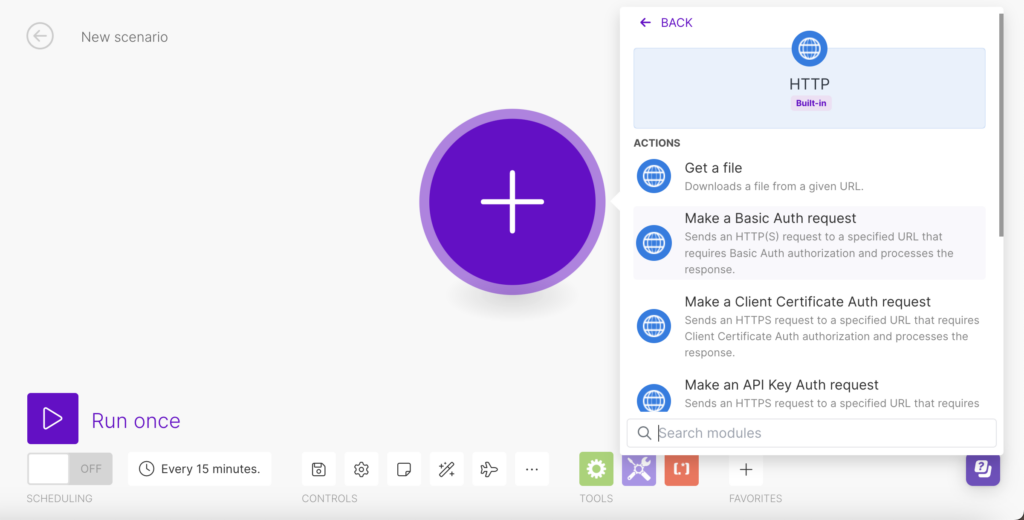
Please create a profile with Make (cheaper than Zapier) or login here. Then, you press the button, Create a new scenario.
Step 2
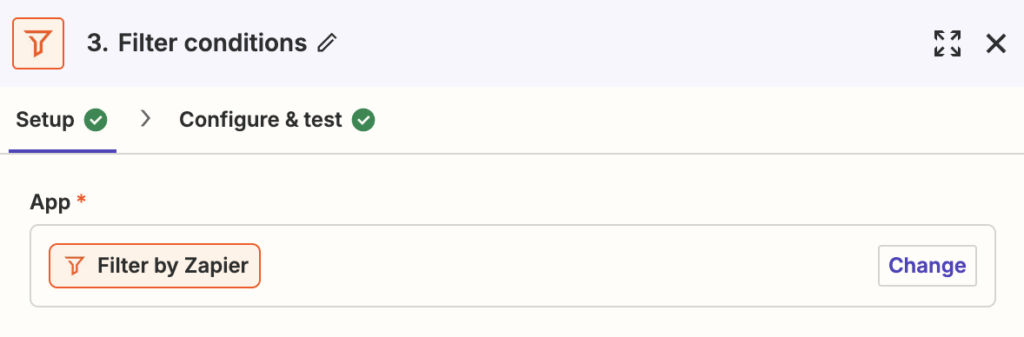
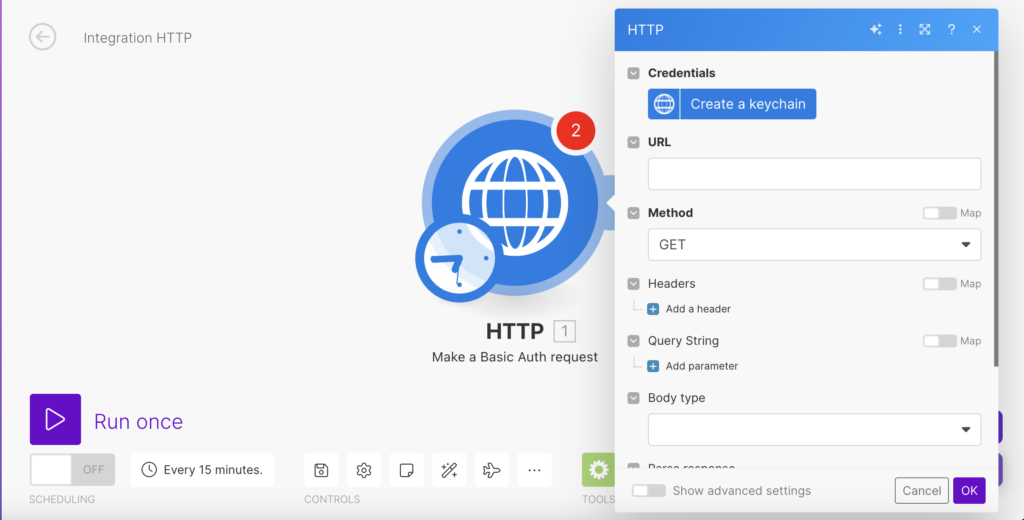
Select the tool HTTP
And then select Make a Basic Auth Request.
Step 3
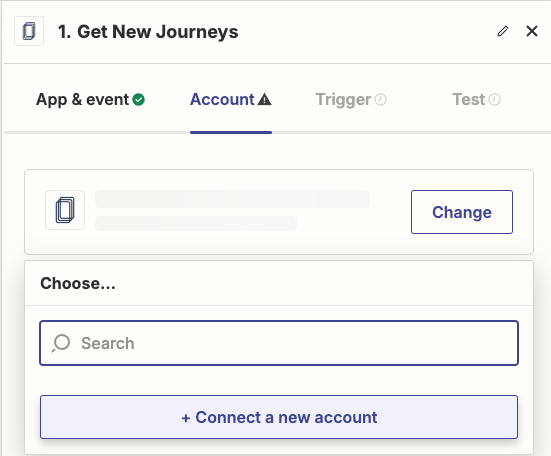
Log in to your Roccai profile.
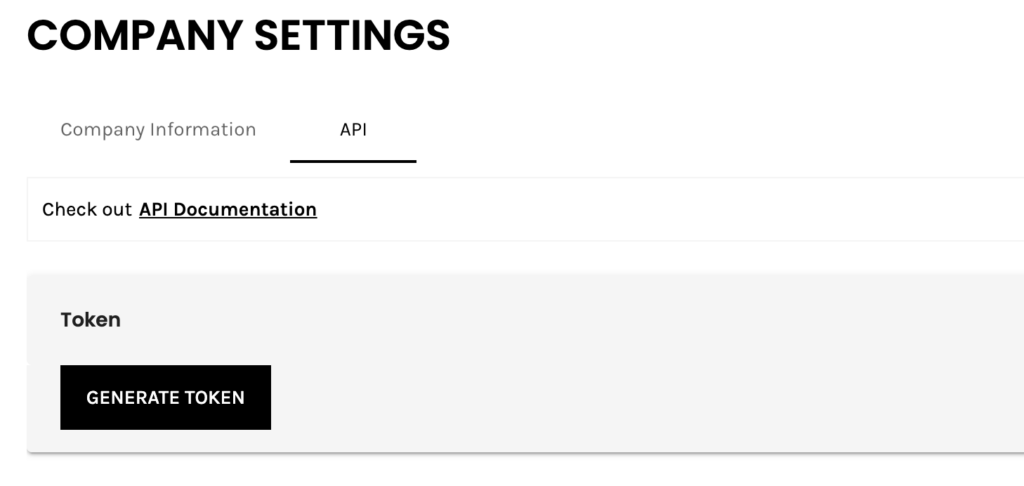
Go to company settings https://app.roccai.com/company-settings
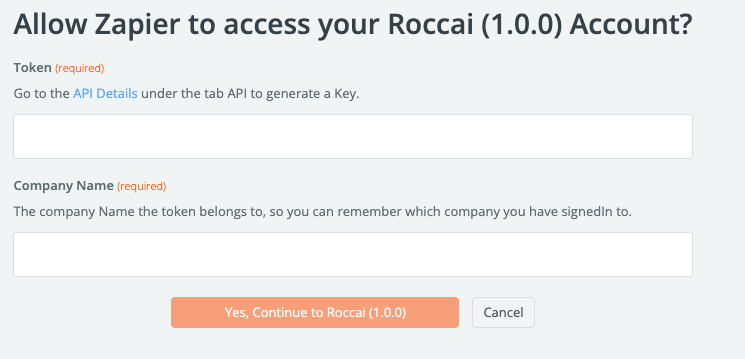
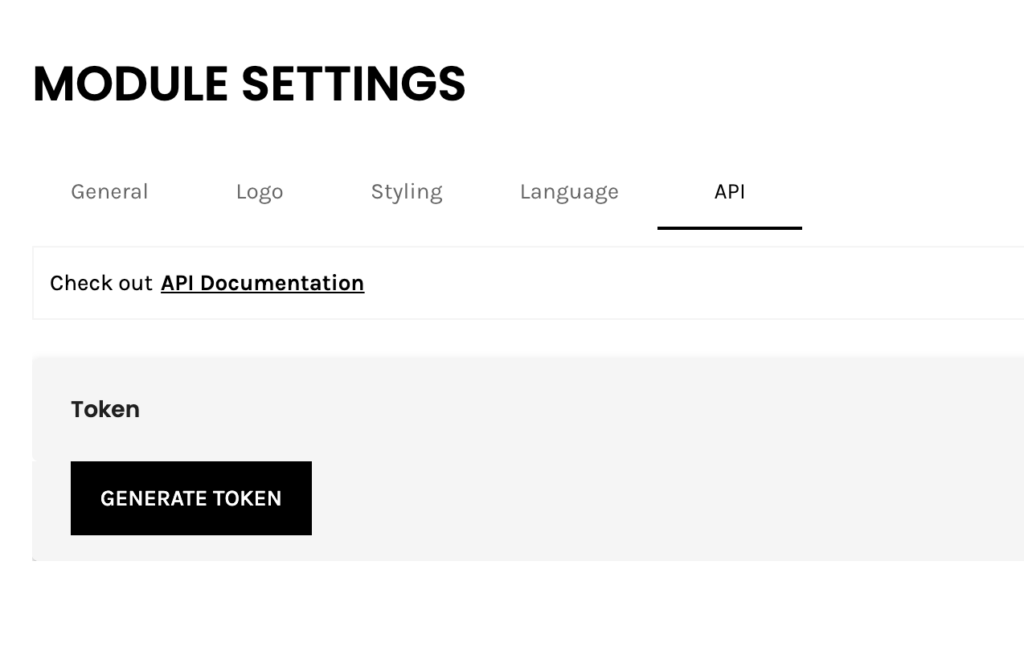
Select API, press Generate Token, and copy the token.
Step 4
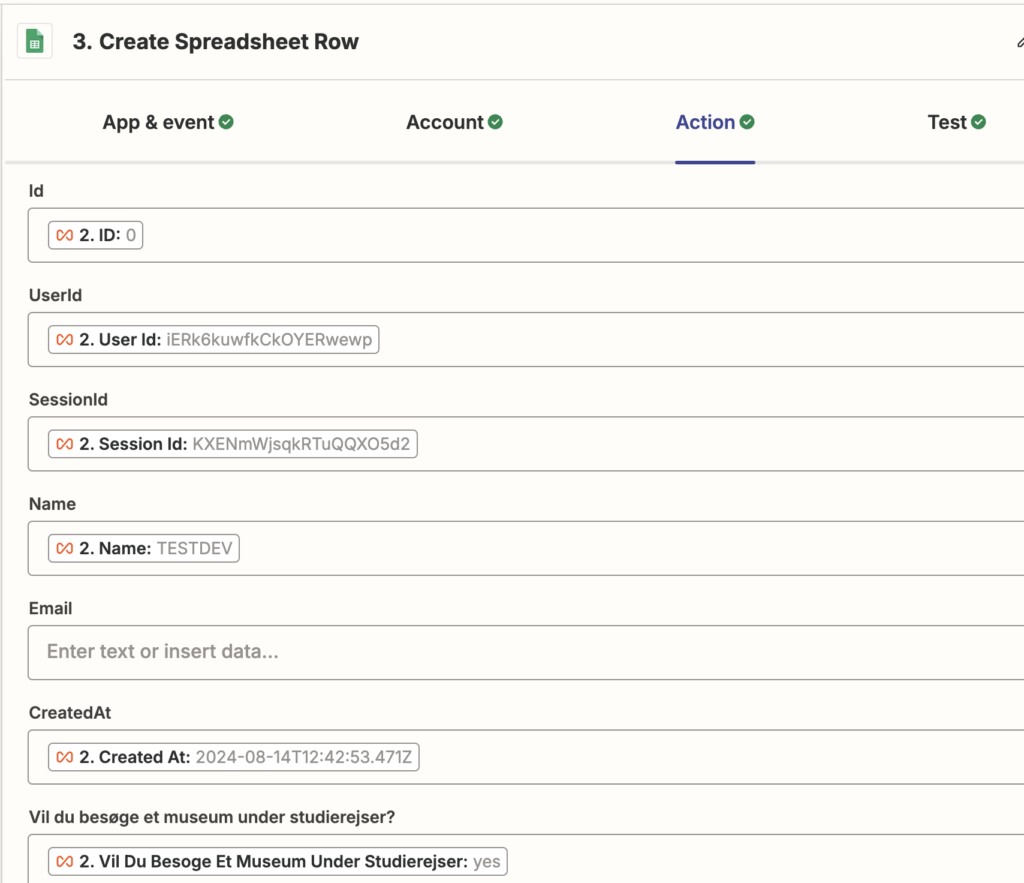
In the HTTP Scenario in Make, you should then fill out the following:
Step 5
Then, add a URL Parameter. The next steps shown how to get the URL Parameter.
Step 6
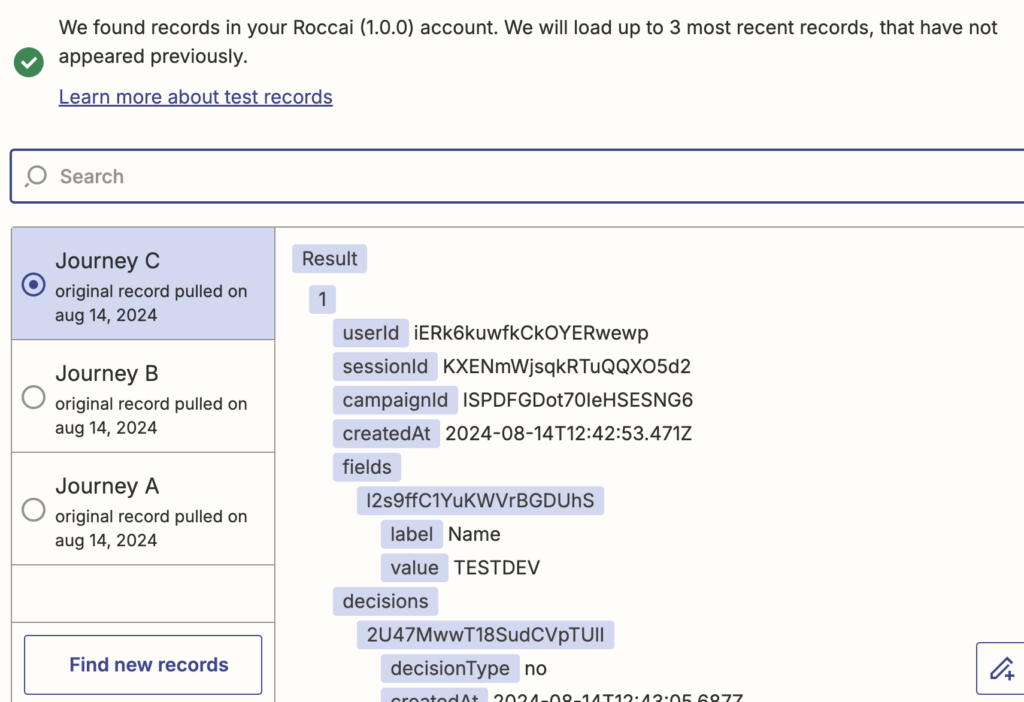
Obtain a valid token to access the Roccai API. You can get your token under Settings and API: Here you also find the API Documentation with the different data you can extract.
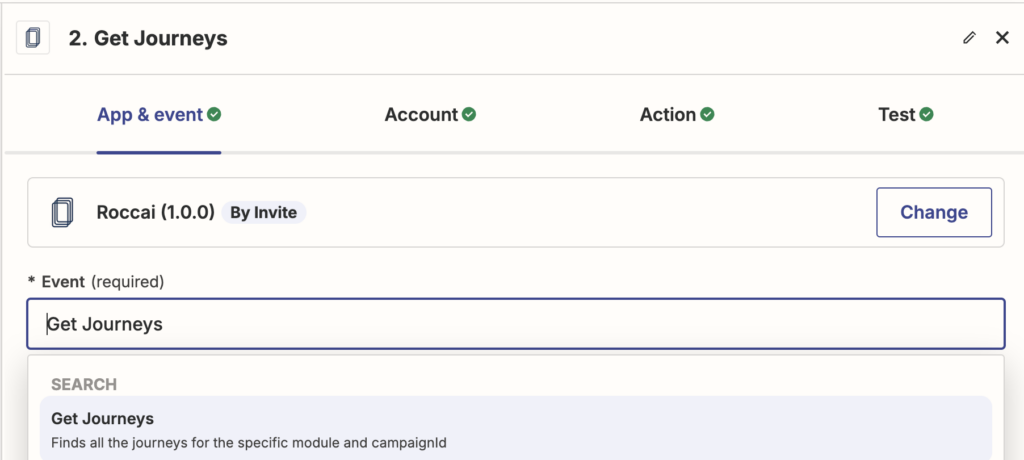
Step 7
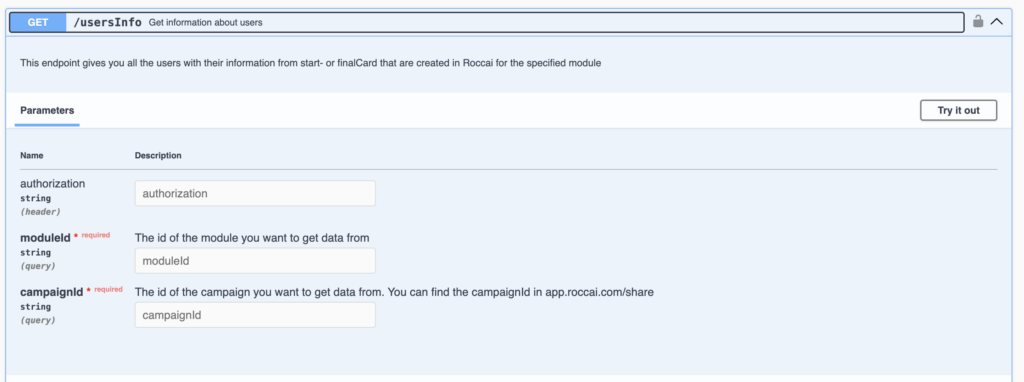
Locate the endpoint that provides the desired information. For instance the userInfo
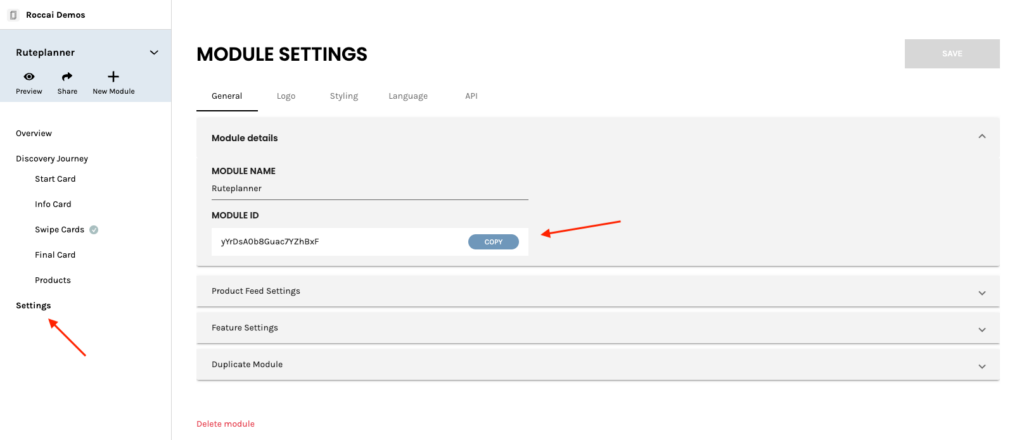
The Module ID is found here:
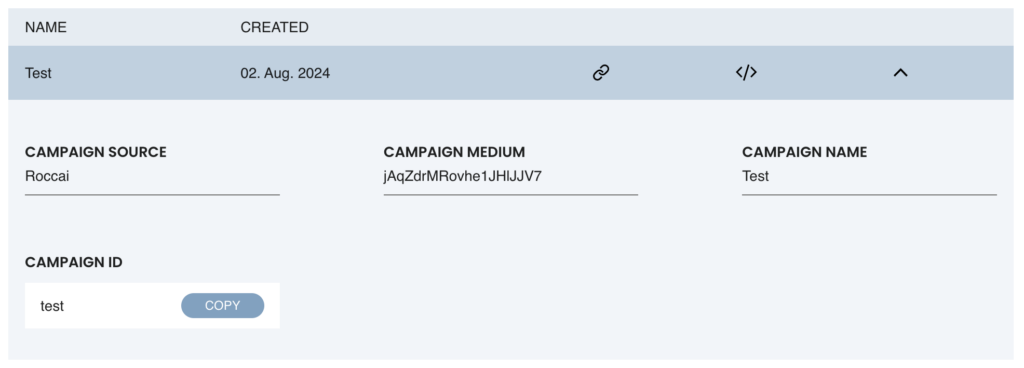
The Campaign ID is found by clicking the Share Icon in the menu. Then click the row on the campaign you want to get the ID from and click copy to get the campaign ID
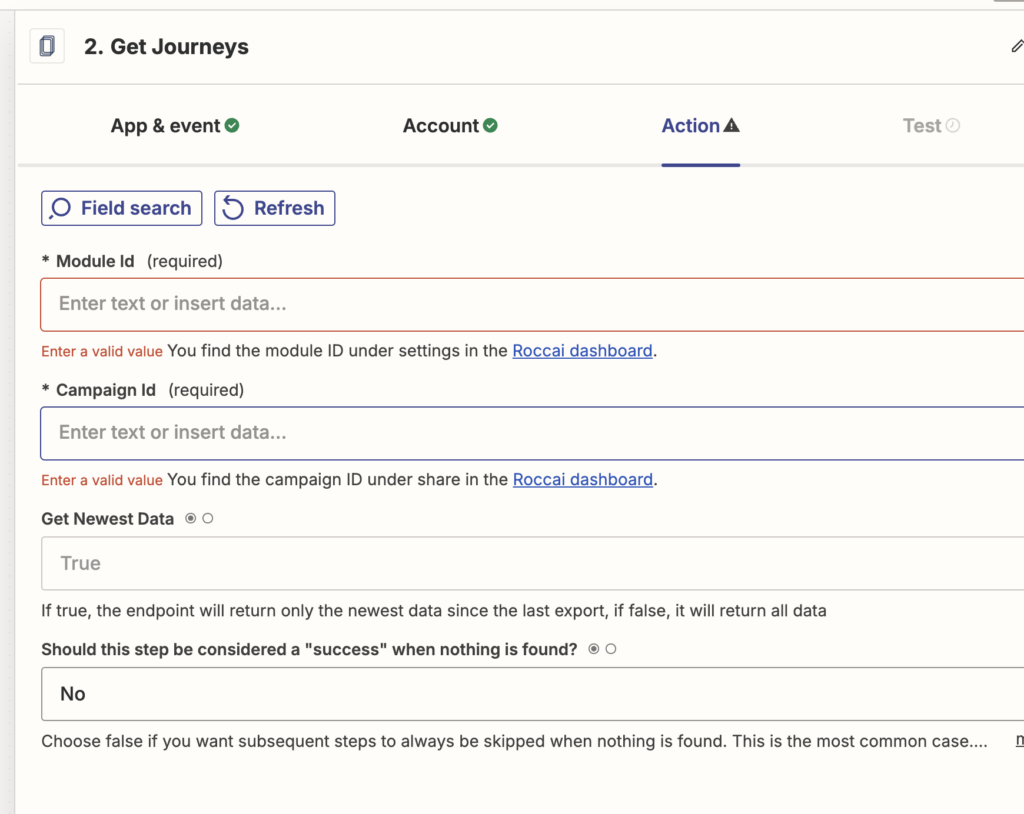
Fill in the details in the API documentation:
Authorization: doesn’t need to be filled out
ModuleId: Specify the required Module Id.
CampaignId: Specify the Campaign Id (CampaignId should only be used for some, such as decisions. It should not be used for products.)
Press the ‘Execute’ button to get a response.
Copy the generated Request URL from the response and add it to Make.
Step 8
If you need more help to export your data from Roccai, write to us in the chat.
Follow these easy steps to generate product feeds using the CTX Feed plugin. This method ensures that your product data is accurate, up-to-date, and ready to be uploaded to our platform to create your Swipe Journey.
Introduction to Product Feeds
Product feeds are files that contain a list of your products and their attributes, such as price, description, image URLs, and availability. These feeds are crucial for listing your products on various platforms like Google Shopping, Facebook Ads, and on our platform too.
Why Use CTX Feed Plugin
The CTX Feed plugin is highly recommended for its user-friendly interface and powerful features. It supports over 100 marketing channels and allows you to create feeds in multiple formats, including XML, CSV, and JSON. This flexibility ensures that your product data meets the specific requirements of different platforms, saving you time and effort.
Step-by-Step Guide to Installing and Using CTX Feed
For simplicity, this guide is divided into two parts. The first part helps you install and activate the CTX Feed plugin. Let’s get started!
Part 1: Installing CTX Feed
1. Log in to Your WooCommerce Dashboard: Go to your WooCommerce admin panel.
2. Navigate to Plugins -> Add New: Search for “CTX Feed” in the search bar.
3. Install and Activate: Click on the “Install Now” button for the CTX Feed plugin and then activate it.
Part 2: Creating Your First Product Feed
Now, let’s move on to the second part: creating and retrieving the product feed.
1. Access CTX Feed: After activation, find the CTX Feed option in your dashboard menu.
2. Create a New Feed: Click “Make Feed” to create a new product feed.
3. Select a Template: Choose a template based on the platform you want to integrate with.
4. Configure Feed Settings:
File Format: Select your preferred file type.
Mapping Attributes: Map your WooCommerce product attributes to the required fields of the selected platform.
5. Generate the Feed: Click on the “Generate” button to create your product feed.
6. Download and Manage: Once generated, you can download the feed or copy the URL to integrate with the Roccai platform. If you choose to download the file, the format must be either XML or JSON.
All done! In order to find and manage the feed you have just created, go to the “Manage Feeds” option from the CTX Feed menu. In there, you will find the newly generated product feed for the WooCommerce store.
Customization Options
This section will guide you through various customization options available in the CTX Feed plugin, including setting up auto-updates, creating custom attributes, and utilizing advanced filtering options.
1. Setting Up Auto-Updates
Keeping your product feeds up-to-date is crucial for maintaining accurate product listings on various marketing platforms. The CTX Feed plugin allows you to automate this process, saving you time and ensuring your feeds are always current.
Navigate to Manage Feeds: Go to the “Manage Feeds” section in the CTX Feed plugin.
Set Update Intervals: Choose how frequently you want the feed to update (e.g., every hour, daily, etc.). This ensures your product data remains current without manual intervention.
2. Creating Custom Attributes
Custom attributes allow you to add additional information to your product feeds that may not be included by default. This can be particularly useful for meeting the specific requirements of certain marketing channels.
Define Custom Attributes: Navigate to the custom attributes section in the CTX Feed plugin.
Add New Attribute: Enter the name and value of the custom attribute you want to add. For example, you might want to add a “Sale Price” attribute for products on discount.
Map Attributes: Ensure that the custom attributes are correctly mapped to the corresponding fields required by the marketing channel.
3. Utilizing Advanced Filters
Advanced filtering options in the CTX Feed plugin allow you to include or exclude specific products from your feeds based on various criteria. This helps in creating more targeted and relevant product feeds.
Access Filter Options: When creating or editing a feed, look for the filter settings section.
Apply Filters:
By Category: Include or exclude products from specific categories.
By Price Range: Set a minimum and maximum price range for products to be included in the feed.
By Stock Status: Include only products in stock or exclude those out of stock.
By Product Attributes: Filter products based on specific attributes such as color, size, or brand.
Save Filter Settings: After configuring the desired filters, save the settings to apply them to your feed.
Manual Product Feed Creation (Brief Overview)
While using a plugin like CTX Feed is the easiest and fastest method, it’s worth noting that you can also create product feeds manually. This involves exporting your product data into a CSV file and formatting it according to the specifications of the platform you’re targeting. This method is more time-consuming and prone to errors, so a dedicated plugin is recommended.
FAQs
Can multilingual feeds be created? Yes, CTX Feed Pro supports multiple languages and currencies, making it ideal for international operations.
How do I ensure my product feed is up-to-date? The CTX Feed plugin offers an auto-update feature that allows you to set regular intervals for updating your product feeds. This ensures your feed data is always current.
What file formats does CTX Feed support? CTX Feed supports various file formats, including XML, CSV, TXT, TSV, JSON, and XLS. This flexibility allows you to choose the format that best suits your needs and the requirements of the marketing channels you’re using.
Following this guide, you can efficiently create and manage product feeds using the CTX Feed plugin, ensuring your products are accurately represented.
If you need further assistance, don’t hesitate to contact our support team or consult the additional resources provided.


Recent Comments