This guide is designed to assist you in getting started with Roccai by using a product feed sourced from your website.
Step 1
The first thing you need to do is create a product feed in your website’s backend. A product feed is a structured file containing detailed information about a company’s products; you might know this from Google Shopping.
The format must be either .xml or JSON.
This is an example of what one item in a Google Shopping feed could look like.
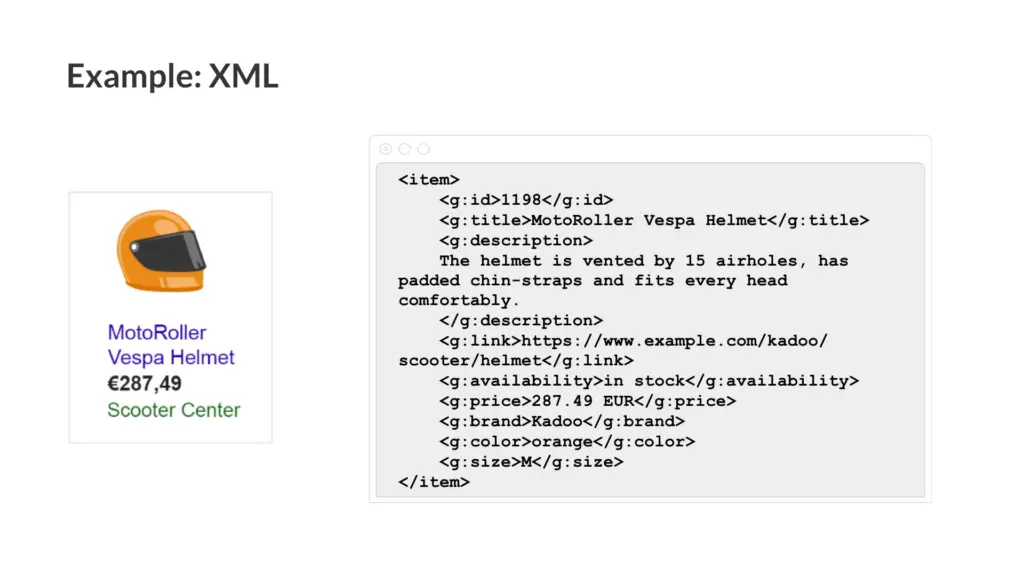
The product feed must contain the following elements
- id (required)
- title (required)
- subtitle
- description (required)
- imageUrl (required)
- link (required)
- tags
- categories
- price
- sales price
- status (in stock etc.)
The product feed should be a live link and updated in real time.
Shopify
If you use Shopify you can use this plugin (up to 100 products for free):
https://apps.shopify.com/product-feeds-generator-by-amasty?locale=da
Woocommerce
See this guide
Step 2
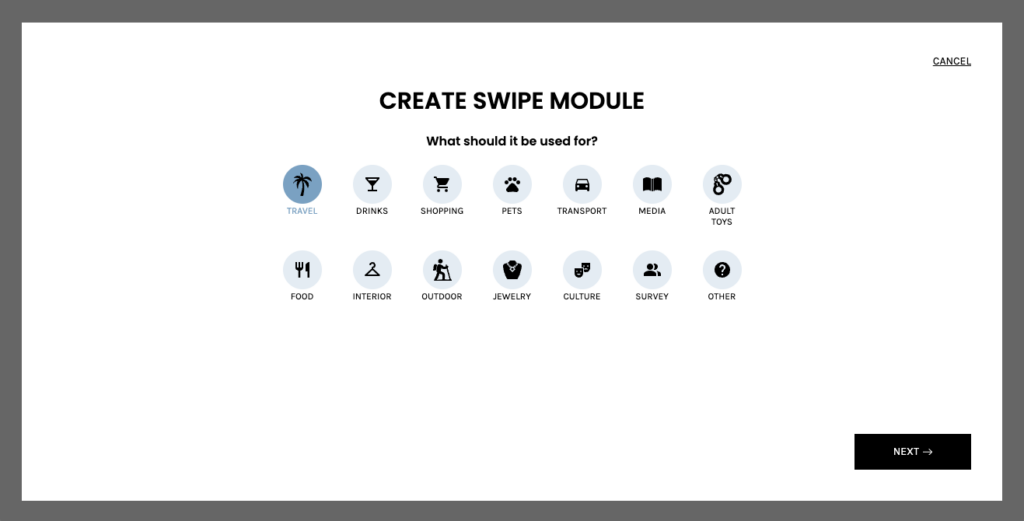
Sign in to app.roccai.com, and the onboarding will begin. Start by selecting a category and press NEXT.
Step 3
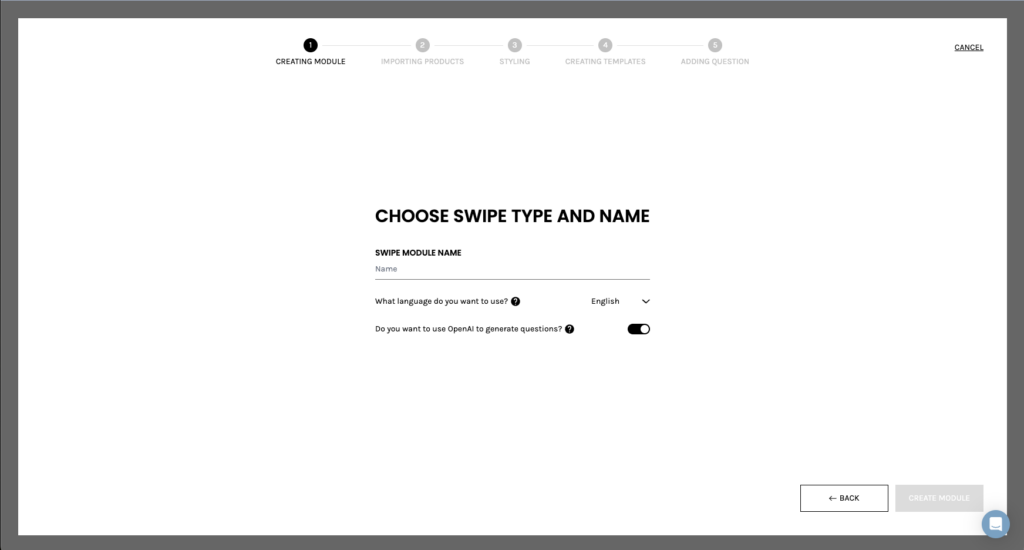
Now, it is time to select a name for your Swipe Journey. Then please choose a language (should be the same as in the product feed) and press CREATE MODULE.
Step 4
You then select Via Link and add your product feed. Press DETECT DATA. If you want to build the swipe journey manually, that is also possible.
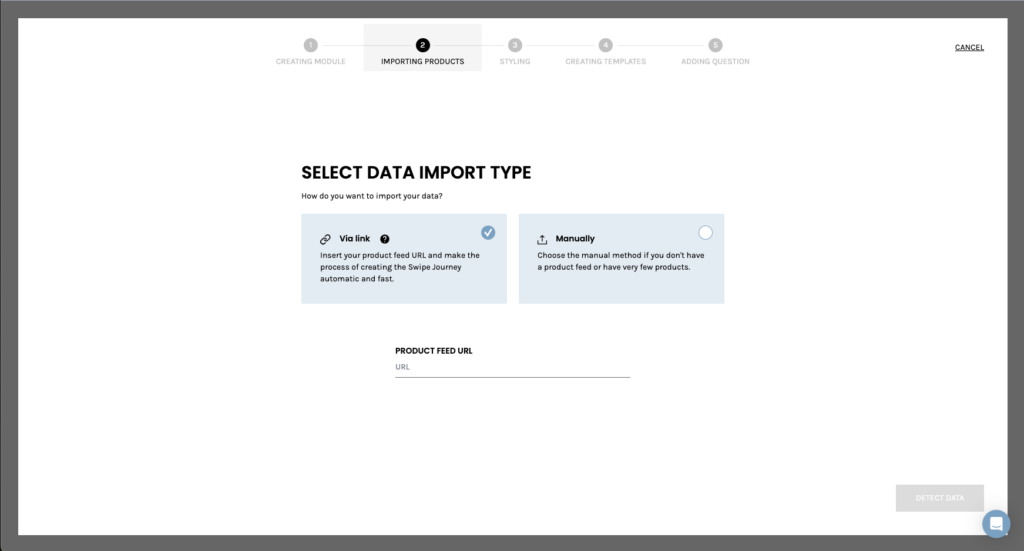
Step 5
You can now check if you are satisfied with how your products are detected. You can see a preview to the right. Press NEXT.
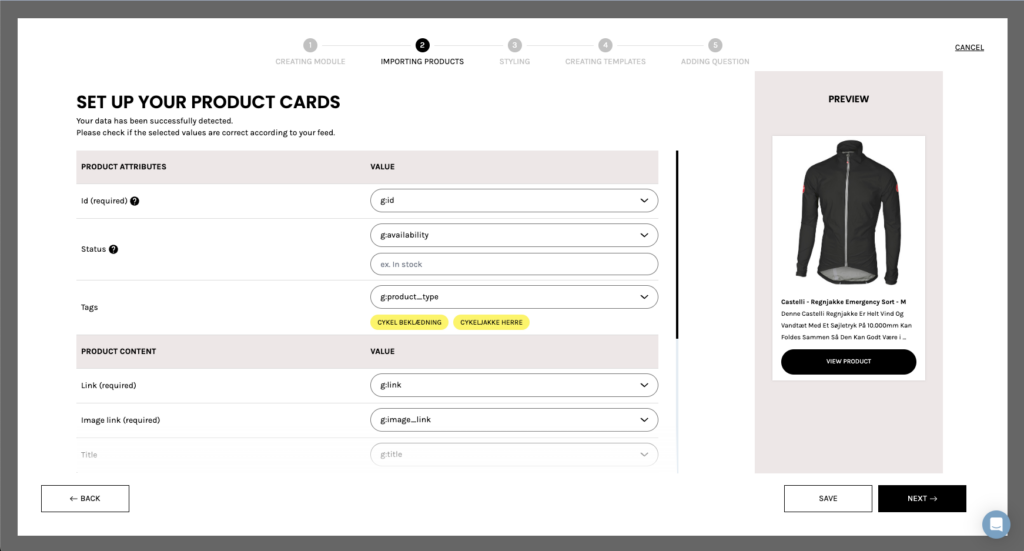
Step 6a
Decide if you want all your products from the feed to be imported or only specific products. Press START IMPORTING
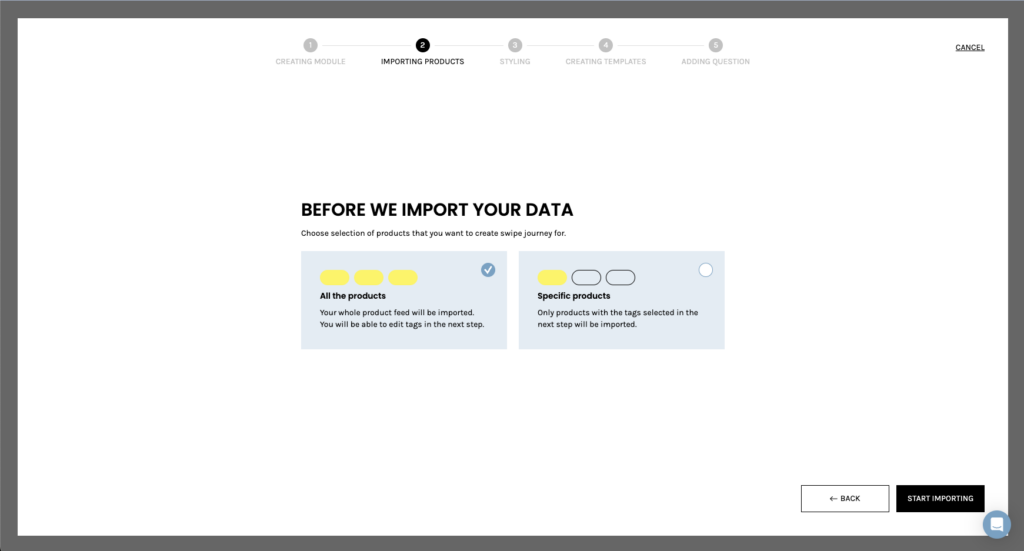
Step 6b
If you only want to import specific products, you simply have to select or remove tags. Press START IMPORTING
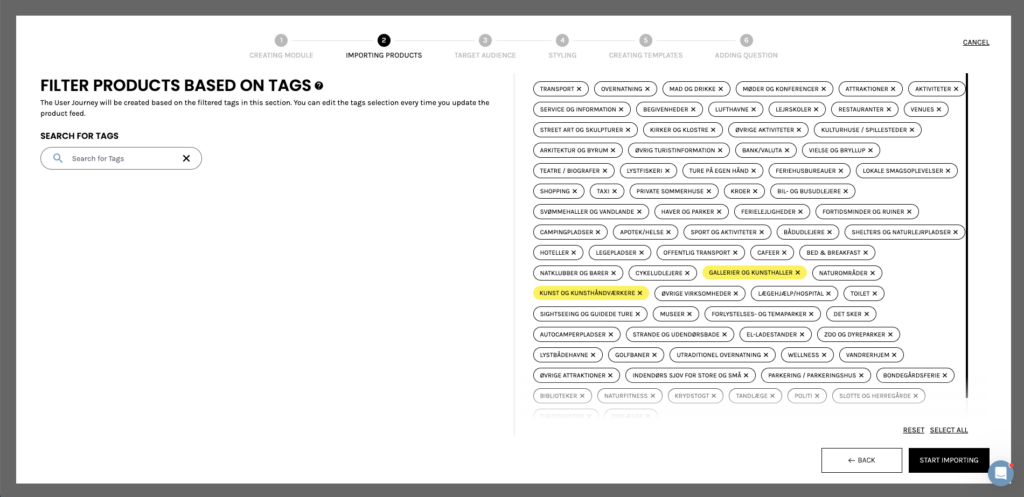
Step 7
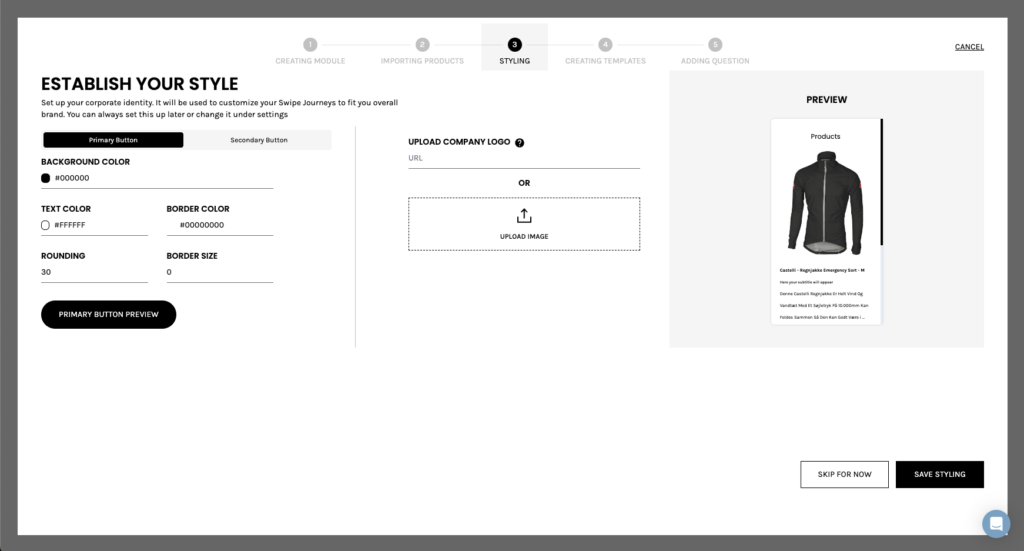
Now, it is time to establish your style. Add your company colors and logo.
Step 8
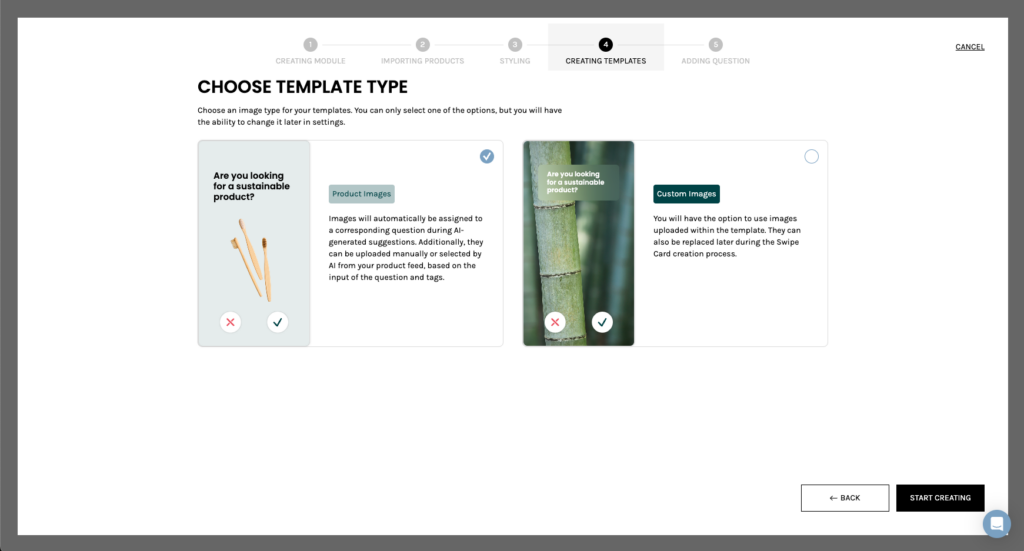
This step is about the design of the swipe cards. To make it as fast as possible, please choose a template style for all your cards. You can use product images, where we pick images from your product feed, or upload background images. Press CREATE TEMPLATE.
Step 9
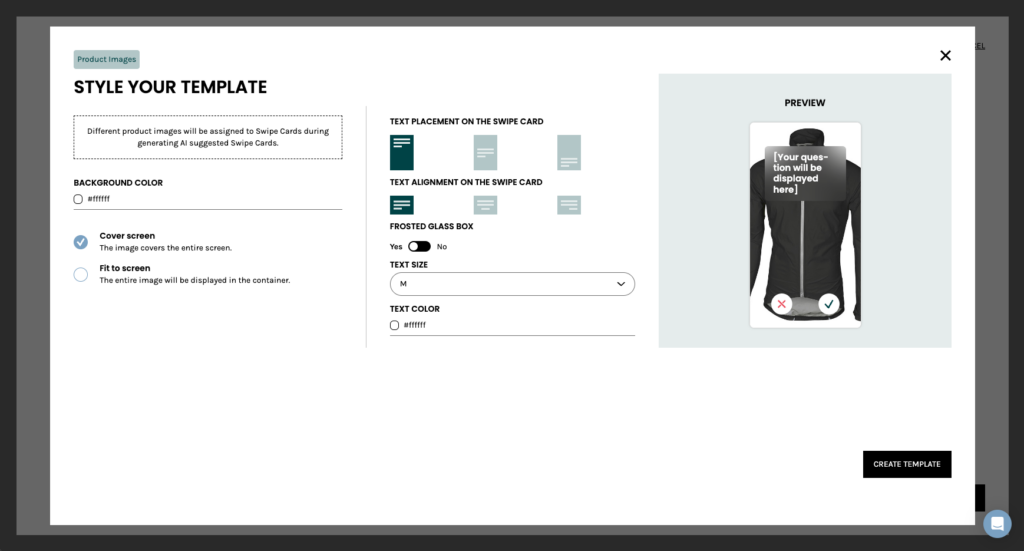
It is possible to make some design adjustments to the templates. It could be a frosted glass box, if the image should cover the screen etc.
Step 10
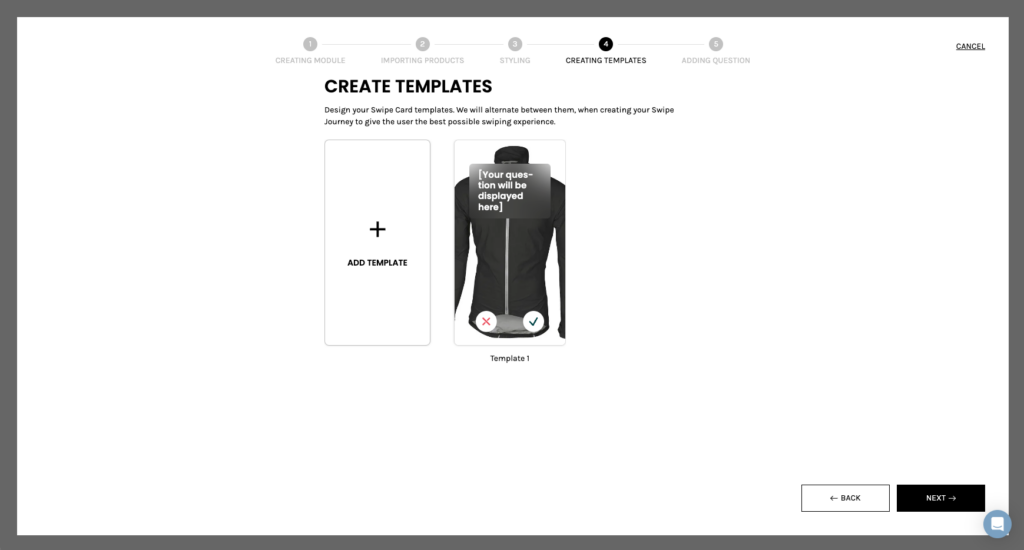
You can add more templates. This is mostly used if you don’t use product images but background images or colors.
Step 11
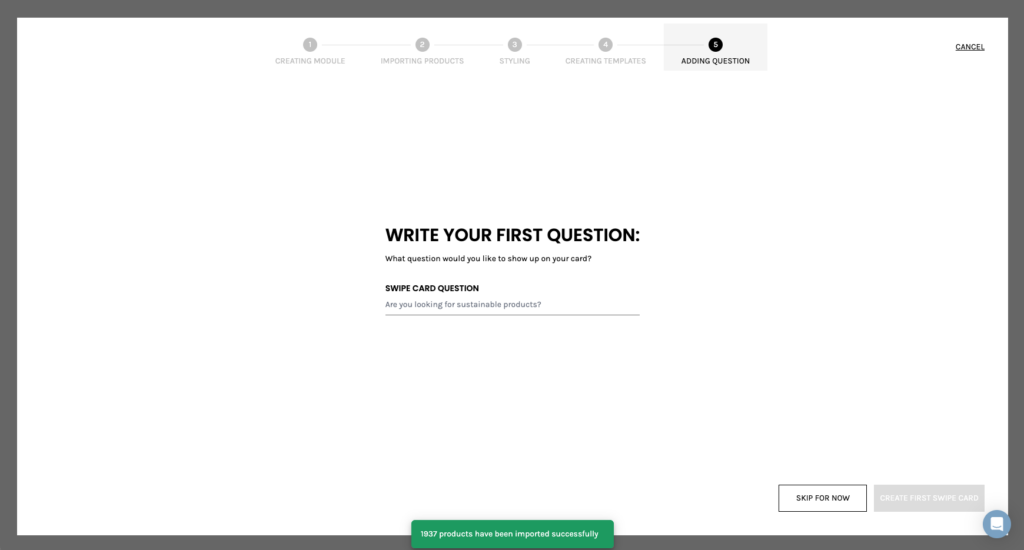
Add your first question if you want, or press SKIP FOR NOW.
Step 12
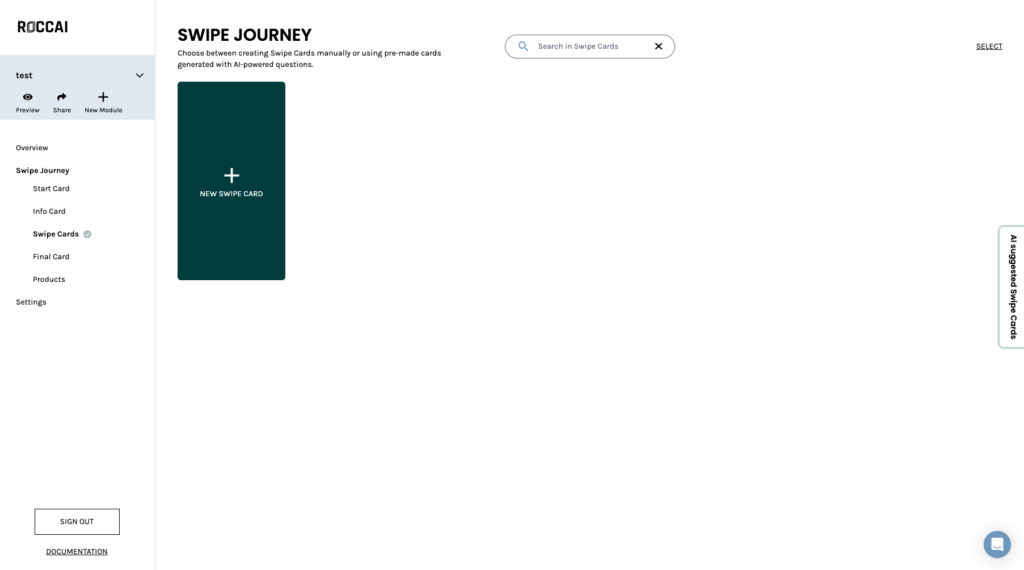
In a few moments, the system will be ready with suggestions for AI-generated questions. You will find them on the right side of the screen.
Step 13
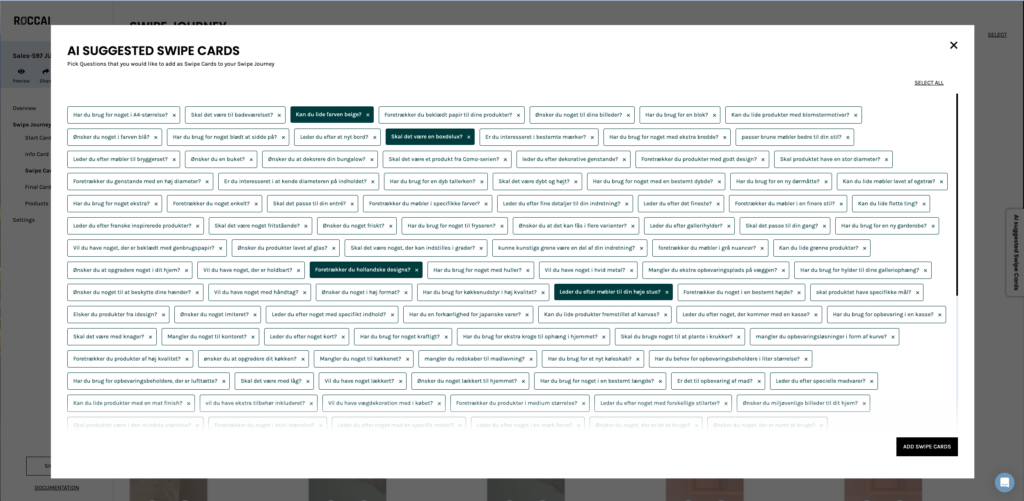
You can now select the AI-generated questions that best suit your target audience. To do this, click on the questions and press ADD SWIPE CARDS
Step 14
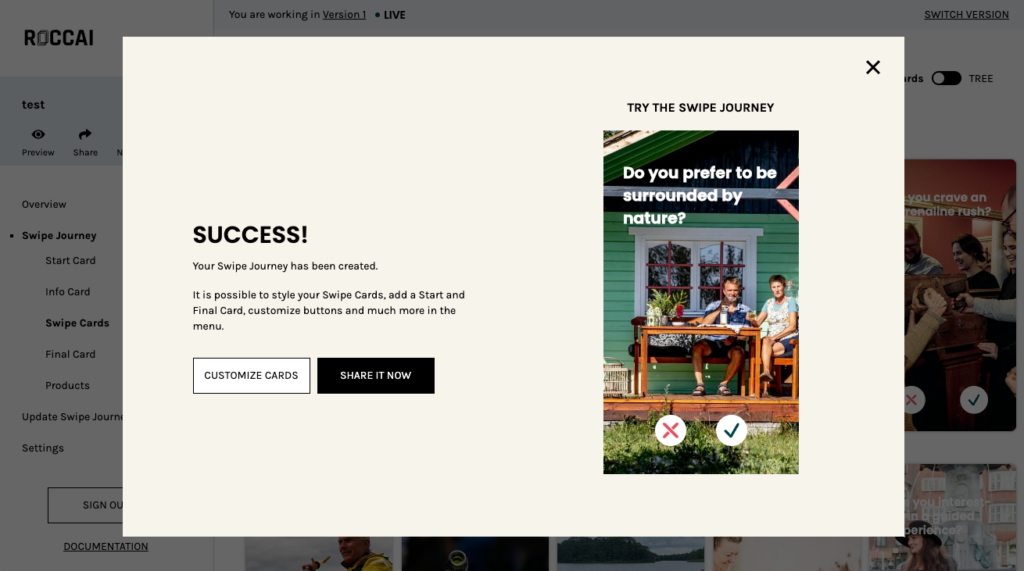
Success! Now, you can try your swipe journey, share it, or customize your swipe cards.
Step 15
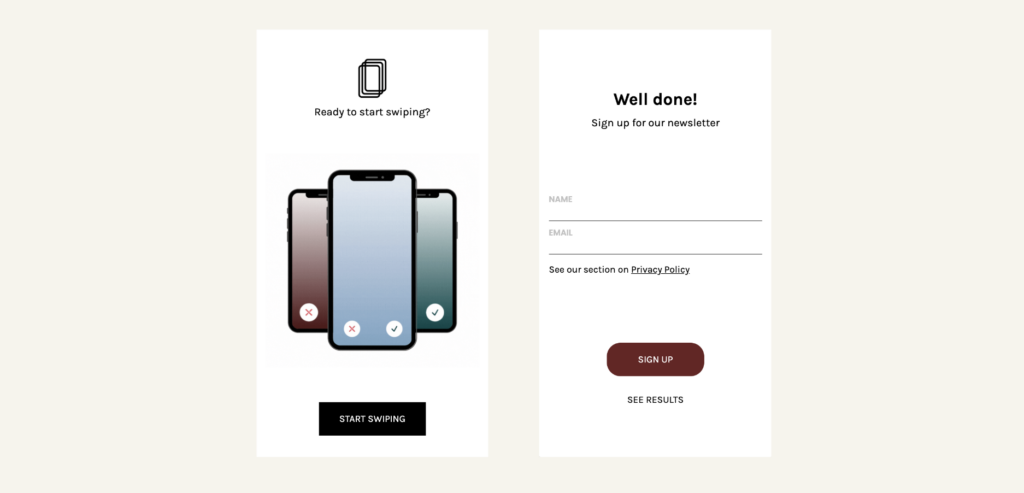
Adding a start, info, and a final card to the swipe journey is possible.
Step 16
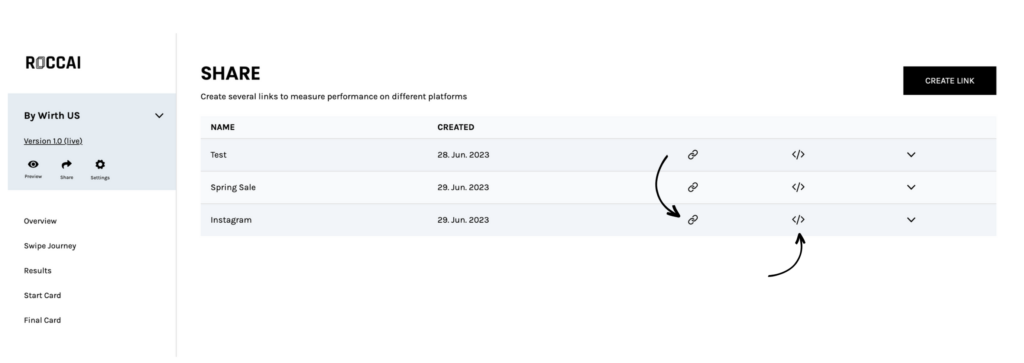
Sharing the swiper journey as a link or embedded code is possible. Learn more about how to create campaigns here.
If you need our help, please contact us via the chat in the bottom right corner.

